Lost Izalith is a Location in Dark Souls and Dark Souls Remastered. This area is normally first found after defeating the Centipede Demon in the Demon Ruins but can also be accessed early through a shortcut before the Demon Firesage fog gate, but only if you are a level 2 Chaos Servant (which costs 30 Humanity). It's the home of the Bed of Chaos, one of the Lord Souls required to finish the game.

General Information
- Previous: Demon Ruins
- Next: The Catacombs
- Recommended Levels: Any
- Bosses: The Bed of Chaos
Video Walkthrough
Lost Izalith Map
(WIP)
NPCs in the area
Bosses
Items
Consumables
- Divine Blessing
- Humanity
- Twin Humanities
- Large Soul of a Lost Undead
- Large Soul of a Nameless Soldier
- Large Soul of a Proud Knight
- Large Soul of a Lost Undead
- Purple Moss Clump
- Blooming Purple Moss Clump
- Soul of a Nameless Soldier
- Egg Vermifuge
- Divine Blessing
- Repair Powder
- Transient Curse
Weapons, Spells & Armor
- Chaos Fire Whip (Pyromancy)
- Ring of Sacrifice
- Soul of a Great Hero
- Sunlight Maggot
- Sunlight Medal
- Dung Pie
- Prism Stone
- Copper Coin
- Gold Coin
- Silver Coin
Upgrade Materials
- Red Titanite Chunk
- Titanite Chunk
- Twinkling Titanite
- White Titanite Chunk
- Green Titanite Shard
- Large Titanite Shard
- Demon Titanite
- Dragon Scale
- Blue Titanite Chunk
Keys & Other
- --
Enemies
- **Bounding Demon of Izalith**
- Stone Demon
- Chaos Eater
- Titanite Demon
- Sunlight Maggot
- Chaos Bug
- Crystal Lizard
- Vagrants
Full Lost Izalith Walkthrough
Entering Lost Izalith
Welcome To Hell - Finding the exit from the boss arena can be a little frustrating, not because of any enemies or death-defying path (well, not since you have the Orange Charred Ring), but because it's a little hard to identify the hole on the wall on the left of the picture below. This hole is the opening of a tunnel that takes you to the entrance of Izalith.
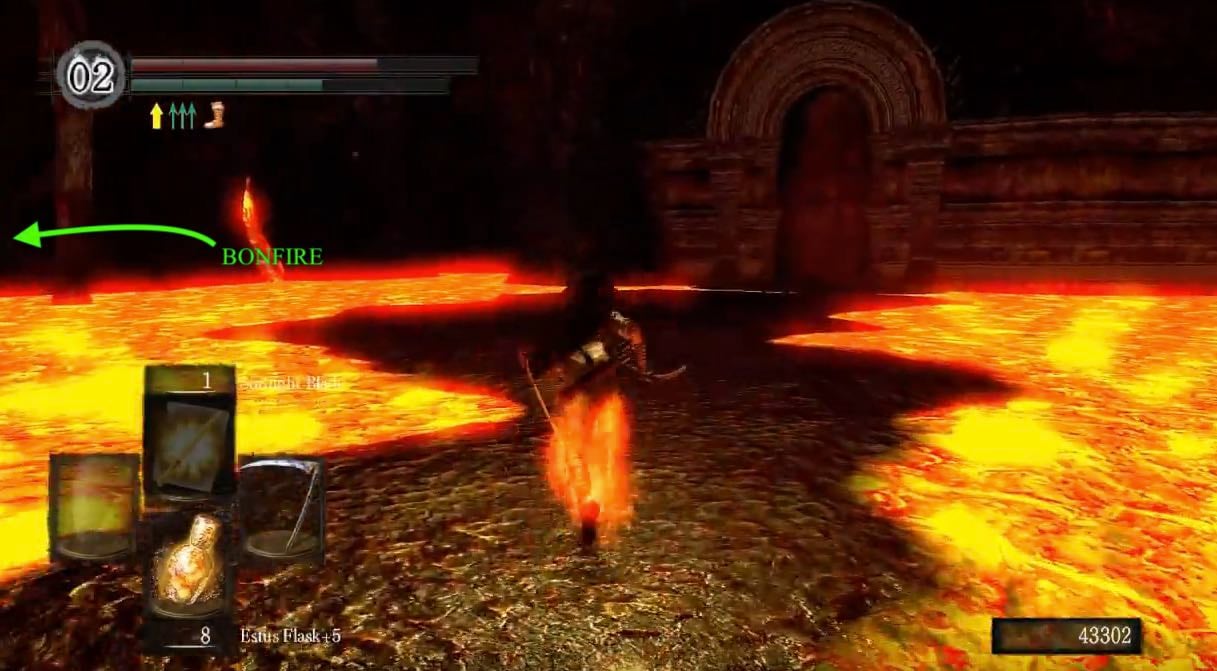
No Sun No Cry - Upon entering from the Centipede Demon boss arena, you'll find a bonfire on your immediate right. If you've correctly followed Knight Solaire's quest line thus far, you'll also find him sitting a few feet from the bonfire, mumbling to himself. Continue forward on the path until the end then cross the lava to climb the tree root ahead, and you'll soon come across a big lava filled area dotted with ruined buildings, a few roots and other small pieces of land. You may also notice the many Bounding Demons inhabiting the area, we'll worry about that in a minute.
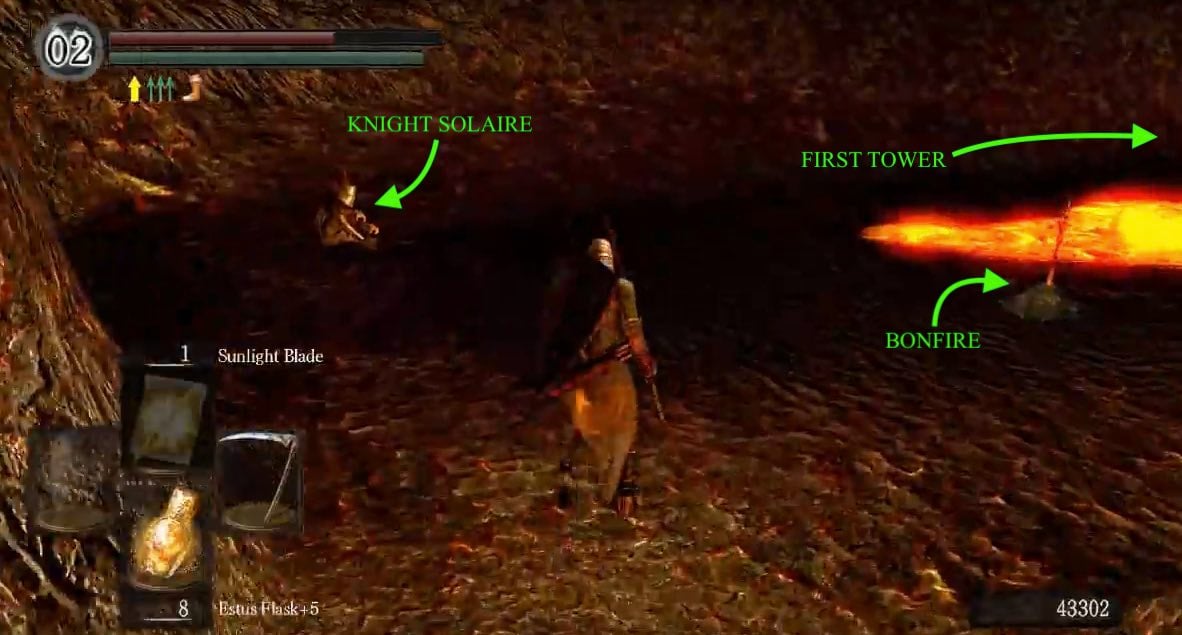
Before you set out into this area, it is essential to equip the Orange Charred Ring you obtained from slaying the Centipede Demon, to make you more impervious to lava damage. Even with the relatively safe path, making it through most of the field via the roots that cross it, you will need this ring equipped at certain points to survive a brief walk through the lava. It is important to note that while the Orange Charred Ring will reduce the damage you receive from lava, your equipped armor will still degrade at the usual rate from lava damage, so ensure you repair your armor as whenever you can.
Bounding Demons are the main threat while traversing this lava field, here are a few key tips and notes on them:They're fast, massive, and hard-hitting.
- Luckily, they can damage each other and don't respawn.
- They are fairly non-aggressive unless you either get too close or attack them.
- There are various ways to lure one out at a time for the kill or, if you prefer, you can also entirely ignore most of them.
- To take them on, a good bow and a full stock of arrows is recommend as long as you can find a safe place to stand where they can't reach you.
- There are various places in the field where they will have difficulty reaching you; such as the entrance to the field just past the first bonfire (stand up on the root on the left side and lure them in with arrows), and inside and atop the towers. Take out as many as you can at range before you enter the field, and then start exploring.
- When using a bow and arrows, beware that while you may have only aggravated one of them, a poorly placed arrow or a clever dodge from the hostile demon, can mean accidentally hitting and inciting the aggro of another. This is likely to happen as there are too many of them, so be prepared to suddenly have to deal with multiple.
- If you have no arrows or want to avoid fighting them at all then it's recommended to follow the path indicated by the roots.
Crossing the Lava Field
N.B. Although the lava itself will only do about 3 damage per tick, straying off the route is extremely dangerous due to the bounding demons. Also, one's armour degrades at a rather alarming rate, potentially cost a fortune in repair.
First Tower
Following the roots across the lava toward the first tower you should find a Soul of a Brave Warrior around a column, on route (no pun intended). Follow the root until you reach a patch of the ground uncovered by lava - here you will find another Soul of a Brave Warrior -, leading to the first tower, where you'll run into some Stone Demons, and possibly a Bounding Demon as you circle around it. On the left of the tower, you'll find an opening leading inside to a chest holding a Soul of a Great Hero. You can also use this sheltered area to shoot arrows at any other nearby Bounding Demons safely.
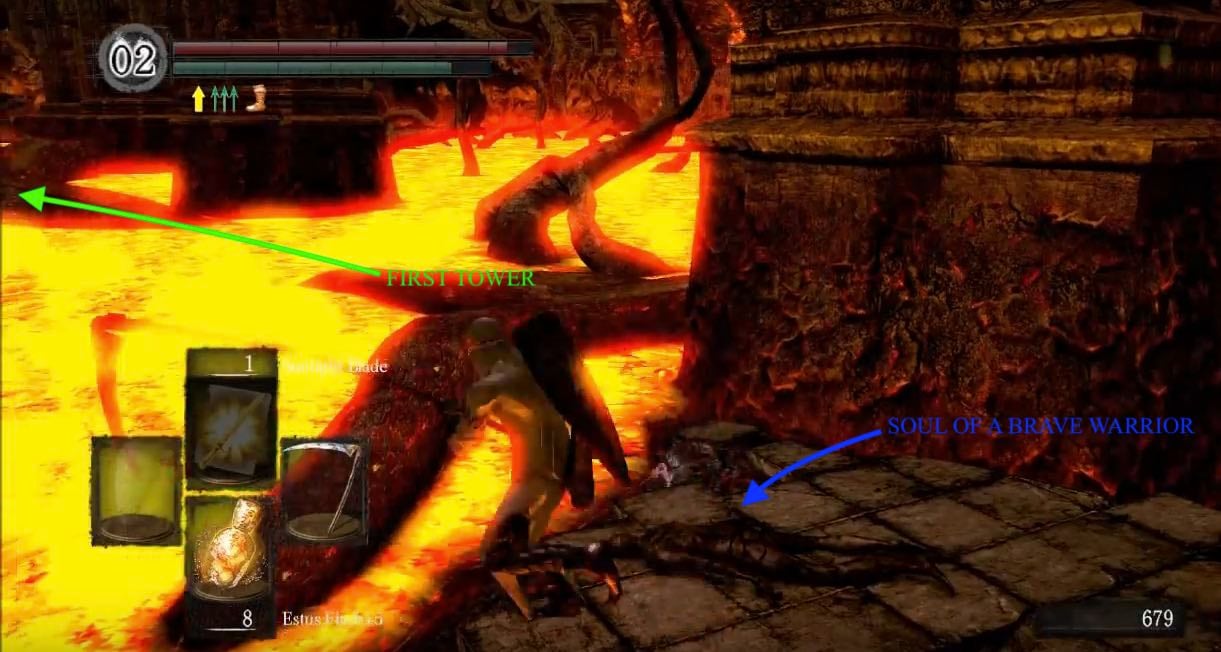
Boundy Hunter
From here, continue left around the tower to rejoin and continue along the root path; which will lead up to a ledge and a broken bridge on the second tower. This is a great sniper spot to take out more of the Bounding Demons. What I've found to be most effective is to locate the two items while on top of the tower; you'll see them off in the distance while standing on the opposite side of the tower where the broken bridge is, along with the corpse holding Twin Humanities. Equip a bow, and start shooting as many Bounding Demons as you can, knowing you are out of harm's reach - literally - while they cluster trying to get you, dealing damage to one another with their attacks (I took out 10 of them in less than a few minutes). Once the coast is clear, drop down, run out and claim your prizes: the two Divine Blessings.
Second Tower
Drop off the side of the bridge, onto the base of the tower, and have a whack at each wall around the tower, until you find the illusory wall. In here lies a second bonfire. You can then make your way out of the lava by walking straight out from the tower bonfire and into the collapsed tower piece that's across the lava, it has a root path inside leading up to the next area. Once you get up out of the lava you may unequip the Charred Orange Ring in favor of a more useful ring. Just don't forget to get it back on, in the event that you die and wound up back at the previous bonfire.
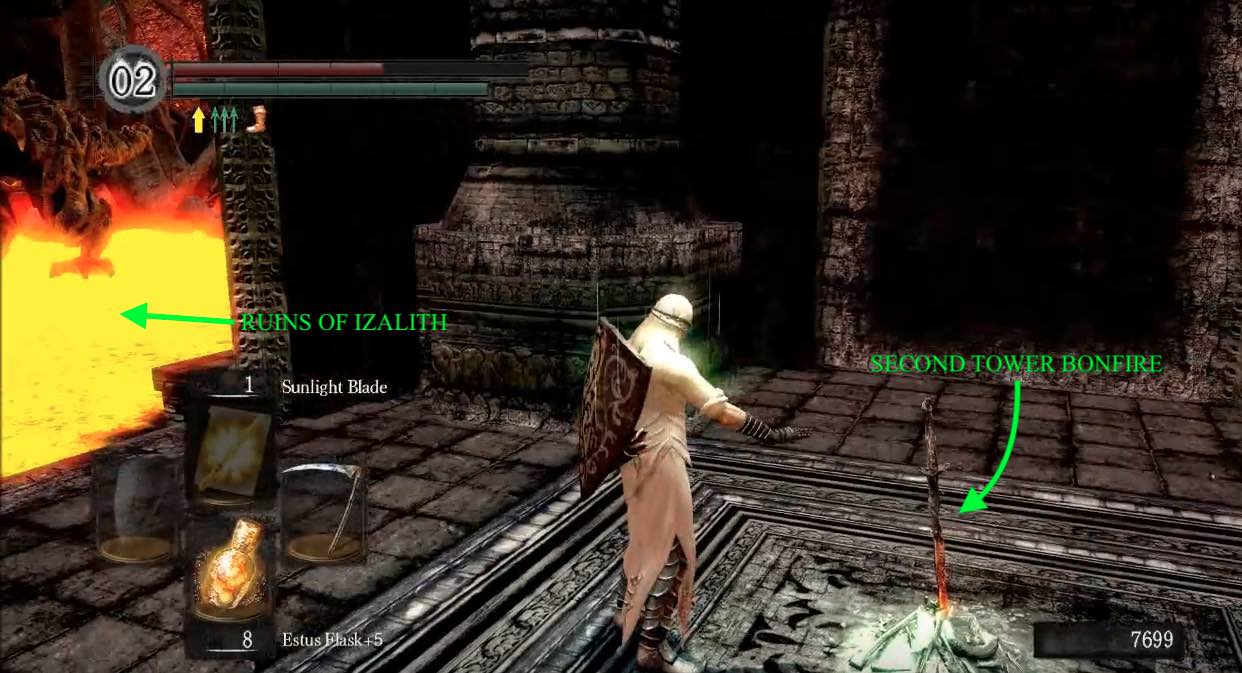
Note: After you've rested and repaired your armor at the bonfire, you can take out the remaining Bounding Demons in the field before proceeding to the next area. Once they're all gone, you can explore the area freely to find the two Divine Blessings hidden in the lava. Leave the bonfire room and walk around the tower until you reach the side that is opposite of the entrance then turn and run directly away from the tower two bodies behind some roots that have the items.
The Izalith Ruins
Cool Feet
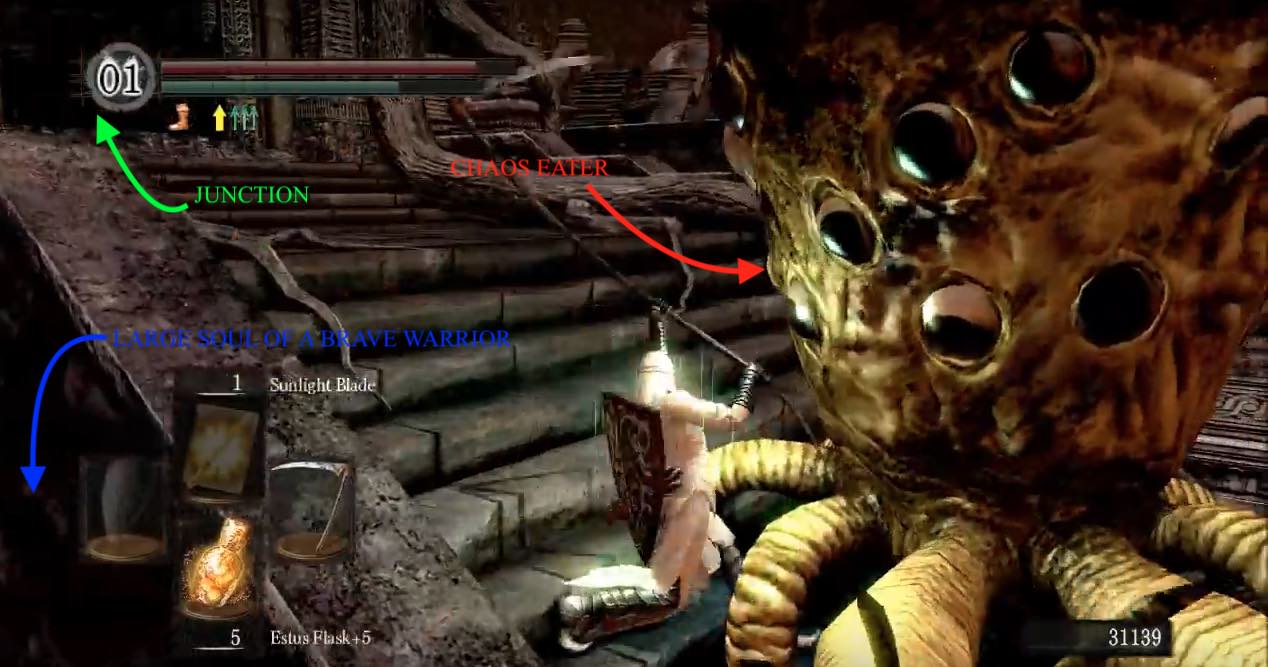
Follow the root to the end, and you'll enter an area comprised of crumbling ruins and columns, which is populated with a sea of Stone Demons, including some up above which can occasionally drop down behind you. Advance cautiously; avoid the attention of multiple simultaneously = avoid getting swarmed. You'll encounter around ten of them in a passage that goes under a bridge and towards a staircase. Before heading up, have a look to the left of the stairs to find a Large Soul of a Brave Warrior.
Ew
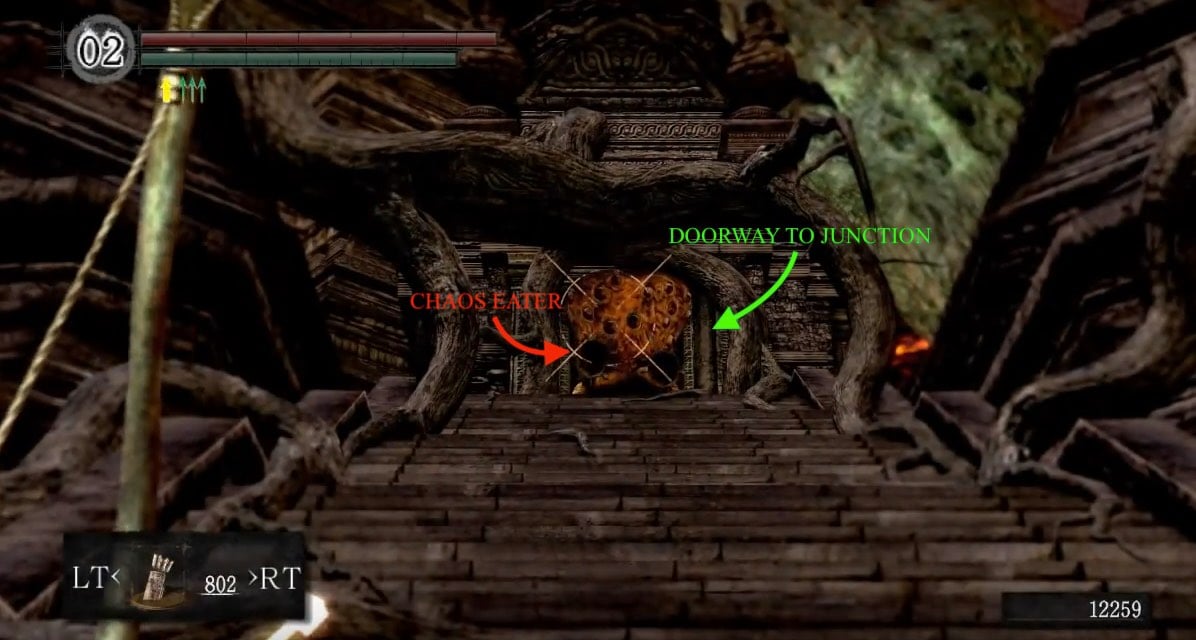
As you go up then you'll find a new enemy waiting at the top - a Chaos Eater. Take these out at range where possible, as their acid attack will corrode your equipment almost immediately, and their grab attack can decimate your health, if not kill you straight away. Past the door at the top of the stairs, you'll face a junction with a choice of routes to take - one to the left with stairs, a middle path and another one to the far right with root paths leading down. The path to the left leads to the boss, so we'll leave that for last.
Heroic Sacrifice
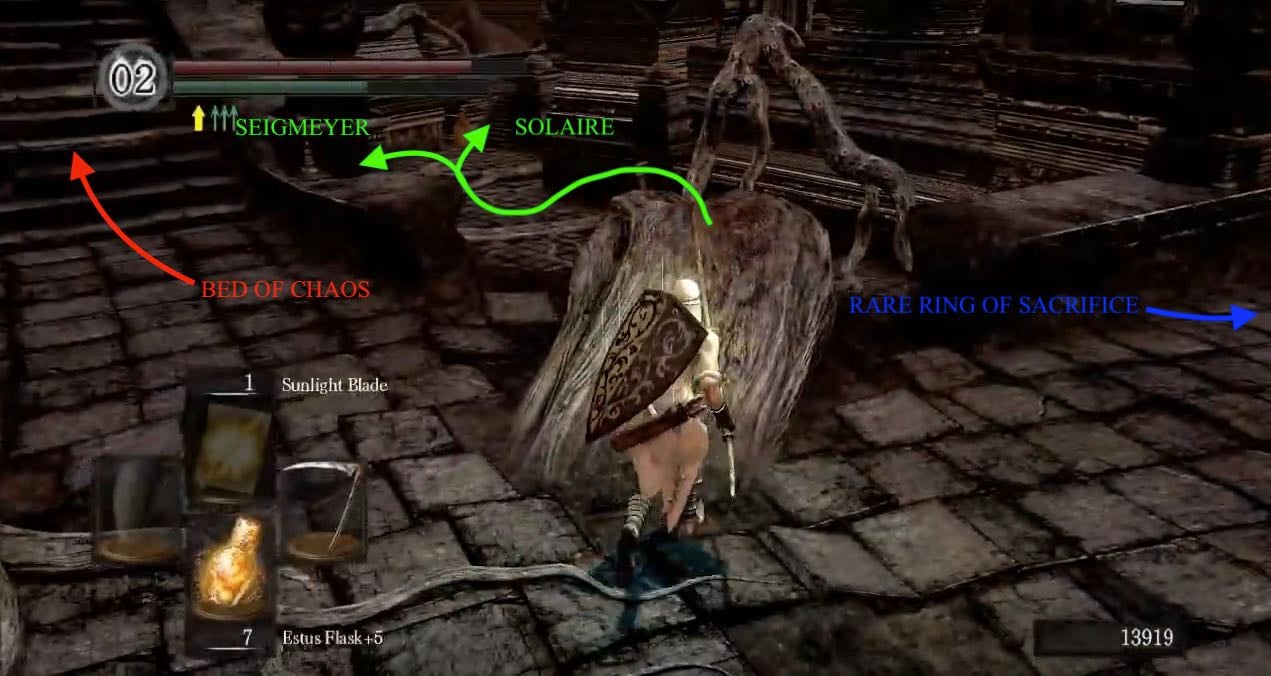
Follow the path on the far right, down the root to find yourself atop the bridge you went under, earlier. The area is not very large and may still have a couple of Stone Demons in it but there's also a couple of items: a Soul of a Hero around the block, and a Rare Ring of Sacrifice on the ledge on the left - get the ring second then drop down and make your way back up to the junction.
Do You Know De Wei
Take the middle path this time to find more Stone Demons down here with a cavernous passage to your left and a staircase to the right. Go up the stairs first, and onto the resulting bridge
The Chaos Servant's Passage
Titanite Farm
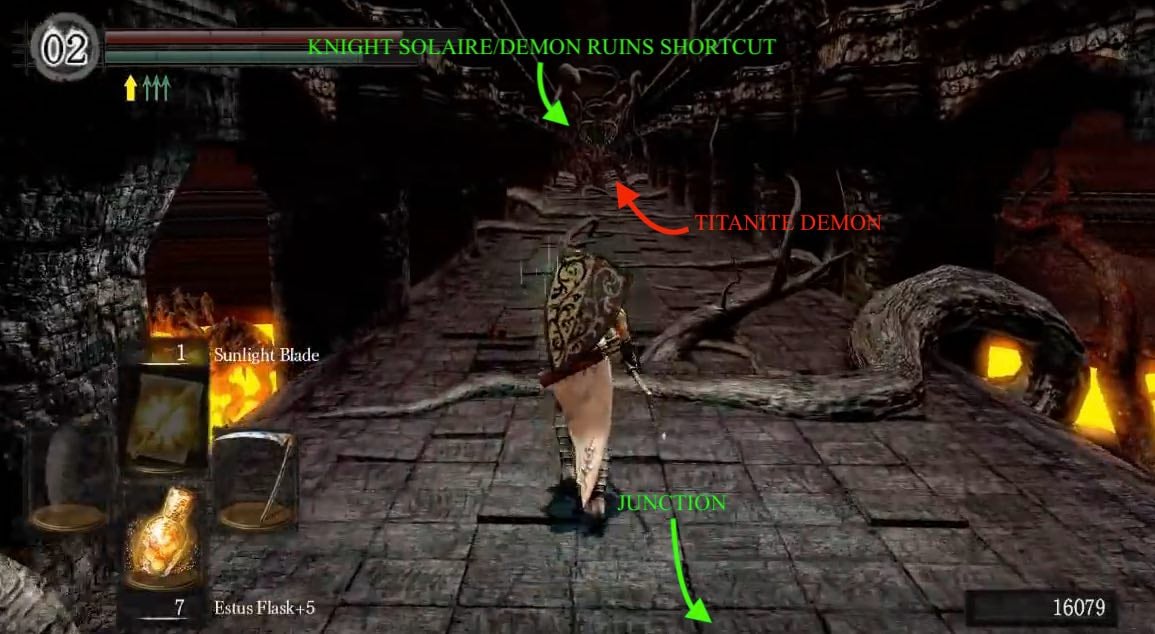
On the bridge there is a Titanite Demon - this particular one drops two Demon Titanite and also respawns - and a Crystal Lizard. A simple way to beat him is to use a bow to lure him in towards a vague upside-down "L-shaped" root formation on the left side of the bridge. If done correctly, he will not be able to traverse over this root and the only way he seems to be able to clear this point is by using his 'jump attack'. Continue to fire arrows at him while avoiding his lightning bolts, and he'll eventually expire. Past this point, you'll be lead into a dark passage where you'll find Solaire of Astora in one of two possible scenarios, depending on what actions you took prior.
Solaire's Fate
Sunset
Spouting nonsense, and with a Sunlight Maggot on his head. The helmet has seemingly driven him crazy and turned him hostile toward you, so you'll unfortunately have to kill him. Doing so will reward you the Sunlight Maggot helm that drove him insane, his armor set, 2 Humanity, the Sunlight Straight Sword and Sunlight Shield, and the Sunlight Talisman. While the Sunlight Maggot basically got your friend killed, it won't have any ill-effect on you and will come in very useful later on in The Catacombs and Tomb of Giants. Continue down the passage to find some live Sunlight Maggots and a huge door. These are harmless, so don't worry about them, and when you approach the huge door it will fall into the floor, and open a shortcut back to where the Demon Firesage fog gate was in the Demon Ruins.
Night Knight
Sitting in despair, mourning his sun - or better yet, the lack of. This is only possible if you opened the shortcut from the Demon Ruins side, but for this to happen you need to be a level 2 Chaos Servant, which would cost you 30 humanity. Doing so has it's advantages though, as it will allow you to skip the Demon Firesage, Centipede Demon, and the whole lava section of Lost Izalith. Once the shortcut is unlocked, you have to find the red eyed Chaos Bug, you will know you got the right one as it will drop the Sunlight Maggot. If you killed the Sunlight Maggot before reaching this point, he will live, and become summonable just before the Gwyn fight.
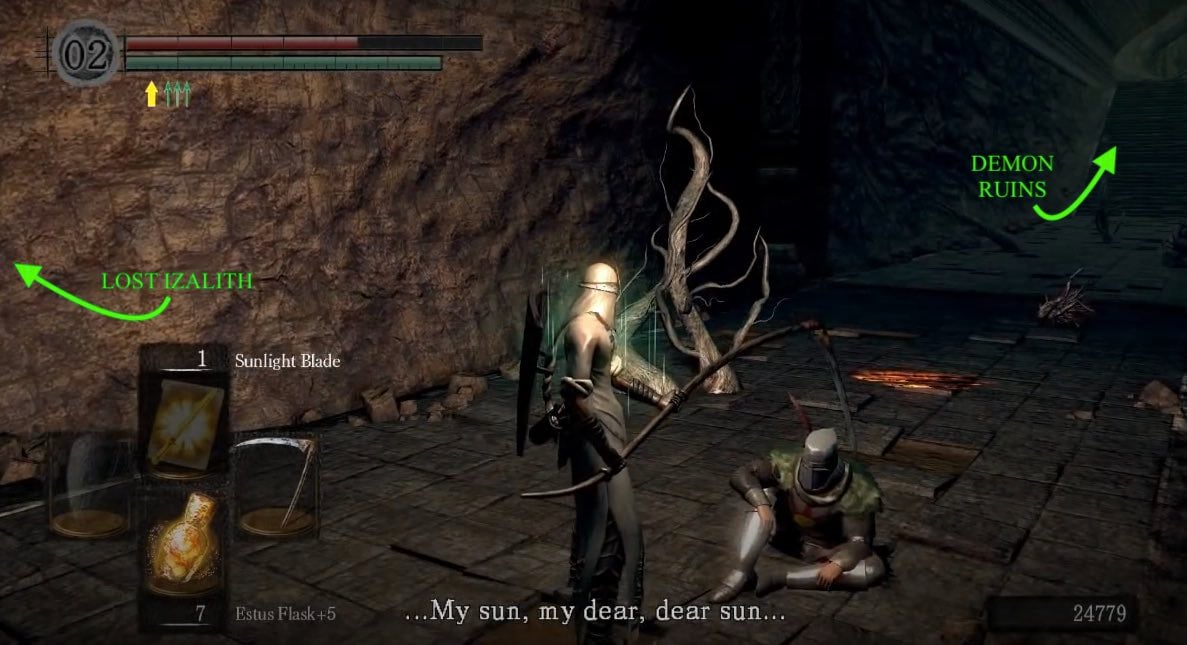
If you did not go the Chaos Servant route, you'll find a root path ahead on your left that goes all the way up to the Demon Firesage fog gate. When you reach at the top of root path look to your left; there is a soul item on the ledge. To get this, reduce your equip load and and make a jump to the ledge (remember to heal beforehand, as a failed jump can cause massive, potentially fatal damage). Now head back across the bridge, and toward the cavernous passage from earlier.
The Chaos Eater Pit
Down The Rabbit Hole - On approaching the cavernous passage you'll notice a corpse with an item inside. But beware that as you enter, the floor will collapse and fall away. Unless you somehow made it far across the floor before it collapsed, you will land on a platform directly in front of and above, a pit of Chaos Eaters. Head left to find a Chaos Eater on an out-of-reach platform, you should probably take care of.
Unleash The Seig - If you have correctly followed Siegmeyer of Catarina's quest-line up to this point then you should find him standing over the pit, opposite to where you initially landed. Make your way around the left, to him, but do not talk to him before defeating all but one or two of the Chaos Eaters using ranged attacks to give him fair chance of survival, as he will attempt to repay you for all your help along the way by leaping in and taking all the Chaos Eaters down there. and you can also jump down with him and help with the fight to ensure he lives if you want. Also, make sure not to kill them all, as this will make him take his own life - see here for more on this.
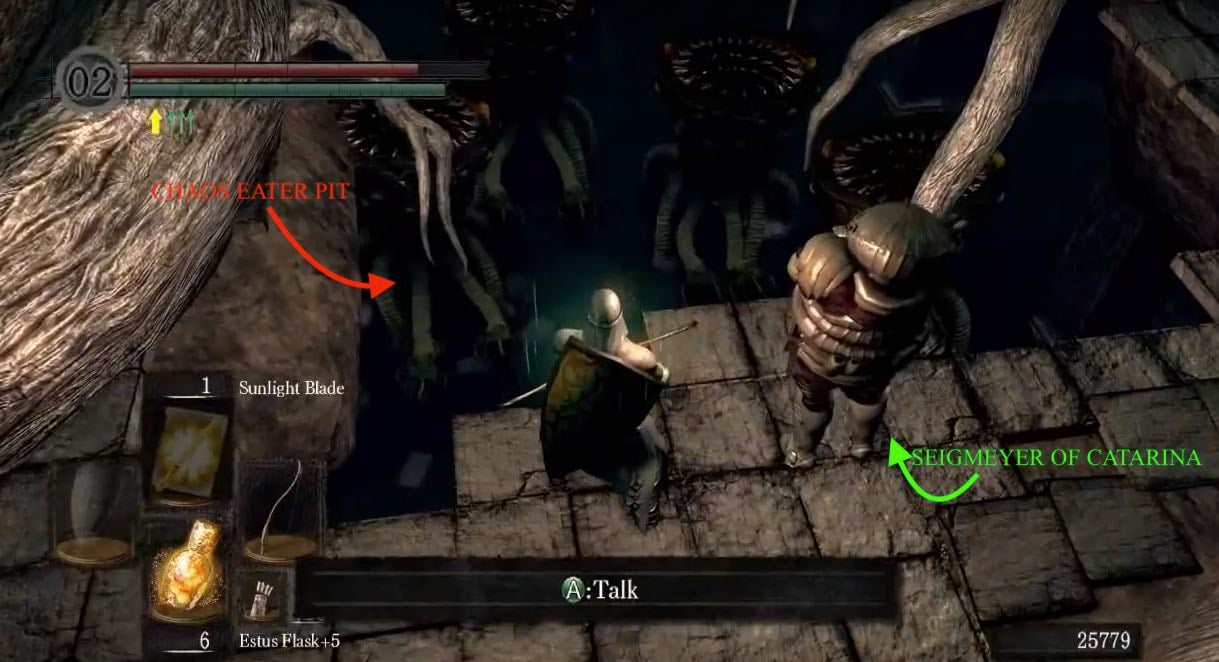
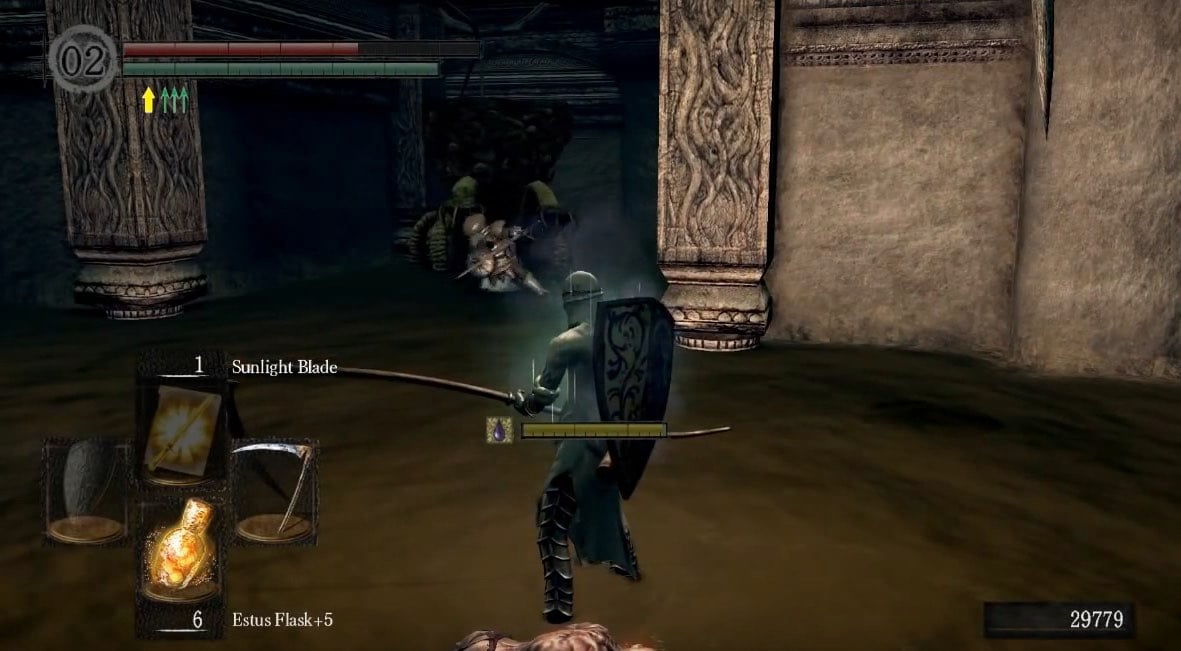
Wet Feet - Be warned that the pit is covered in Blighttown-esque swamp water which slows movement and poisons you, so poison cures and the Rusted Iron Ring are advised to help getting around down here. Upon landing down here, you will find three items triangulated around you: 1 Red Titanite Chunk, 2 Green Titanite Shards, and a Soul of a Brave Warrior. Skirt around the large open shafts down here to find passageways beyond them - one of which is a dead-end with a chest holding a Red Titanite Slab. From this dead-end, you can head back and turn right, then left - traverse the sides of the two upcoming square pits - and then make another right turn, to find a set of stairs heading up to the location of the out-of-reach Chaos Eater; feel free to first explore the rest of the area for any more items.
On to the Bed of Chaos
Daughter? - With all the above done, head back to the junction and walk toward the stairs on the left. Right as you begin to climb them a Daughter of Chaos - has a chance of dropping the Izalith Catalyst - will turn the corner up ahead and start attacking you. She wields some powerful Chaos Pyromancy spells, but shouldn't prove too difficult to take out. At the top of the stairs, you'll see the fog gate leading to The Bed of Chaos on your left, and more stairs going down ahead. Before going toward the fog gate, go down the stairs ahead to find a chest guarded by another Chaos Eater - the chest holds the Chaos Firewhip Spell.
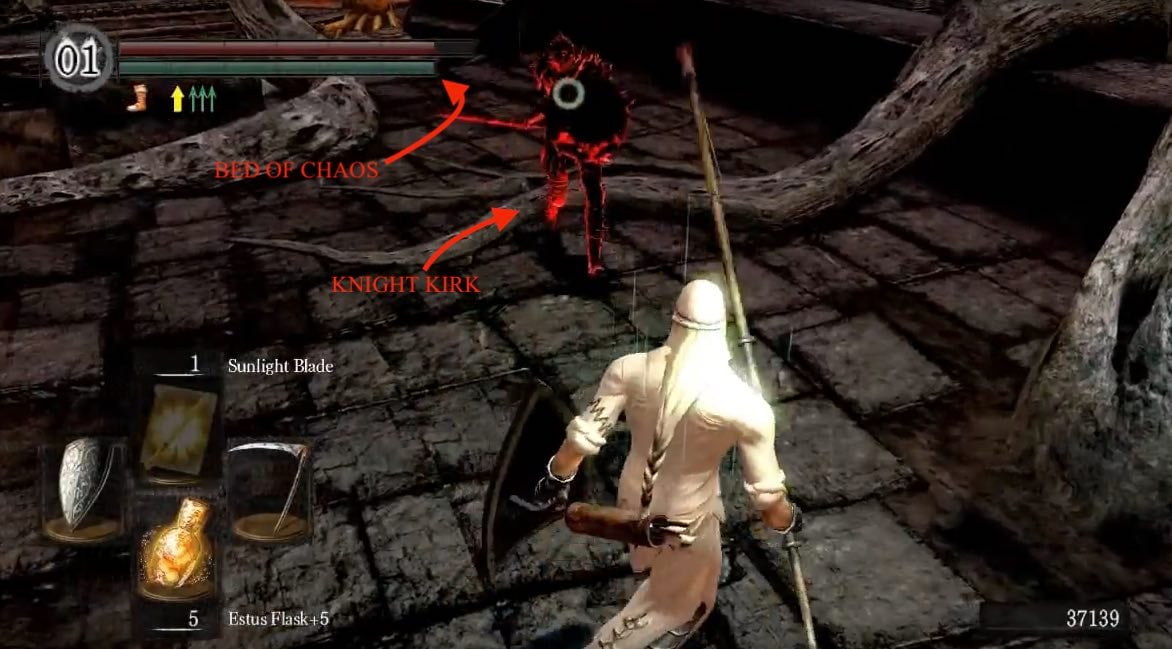
Final Invasion - Return to the fog gate, and along the way, you'll be invaded by Knight Kirk if you are in human form. This is the last of his invasions, and given that you beat the him in the Depths and Demon Ruins already, you'll find his armor set near the Chaos Servant covenant bonfire after your encounter. Nothing left to do now but go through the fog gate, and slide into...
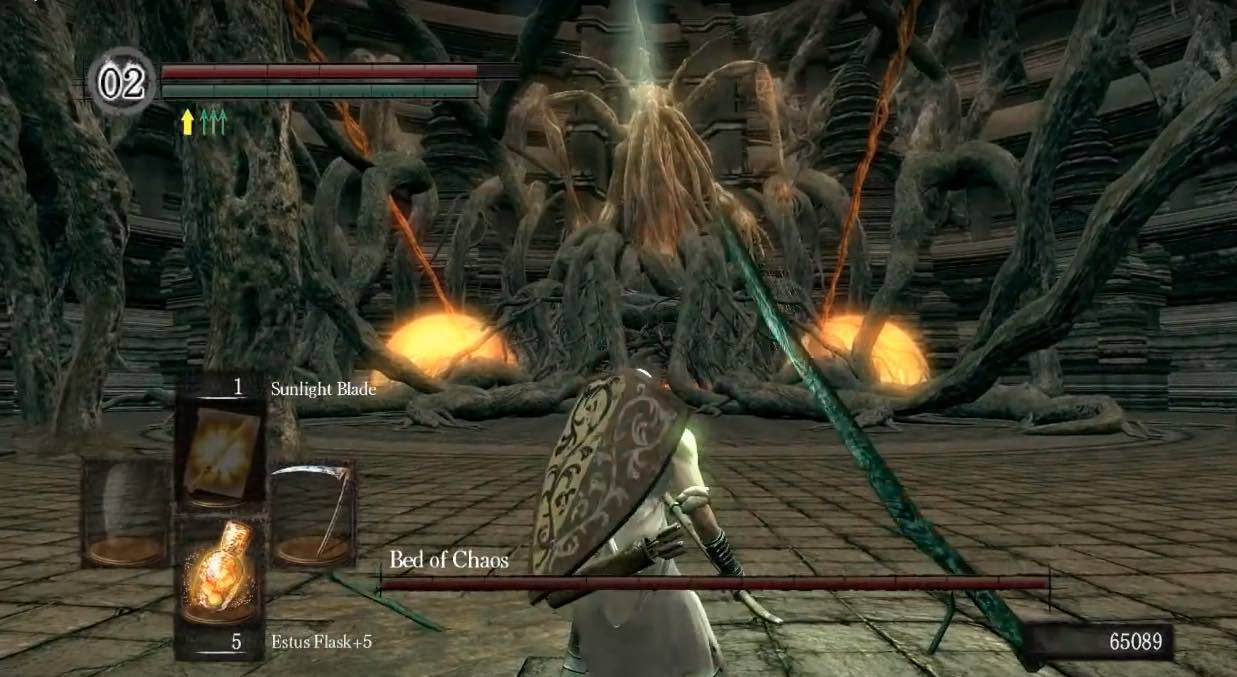
Boss Fight: The Bed of Chaos
Once you kill the Bed of Chaos you'll find yourself stuck in the small area that housed it's heart, with only a bonfire for company. So, use the bonfire to warp out of there and back to Firelink Shrine to continue the main quest in The Catacombs.
Note: This walkthrough is for those that are at level 2 in the Chaos Servant covenant and used the shortcut before the Demon Firesage fog gate to enter Lost Izalith early, rather than using the usual entrance after the Centipede Demon.
The Chaos Servant's Passage
Major Detour - Taking a right turn just before the Demon Firesage fog gate you'll find a root path leading down to a dark passage with Sunlight Maggots jumping around. (They're harmless, but worth killing - read the 'note' below to find out why) However, before going down the root path just see towards your right, there is a soul item on the ledge and to get that you have to reduce your equip load and make a jump on to the ledge.
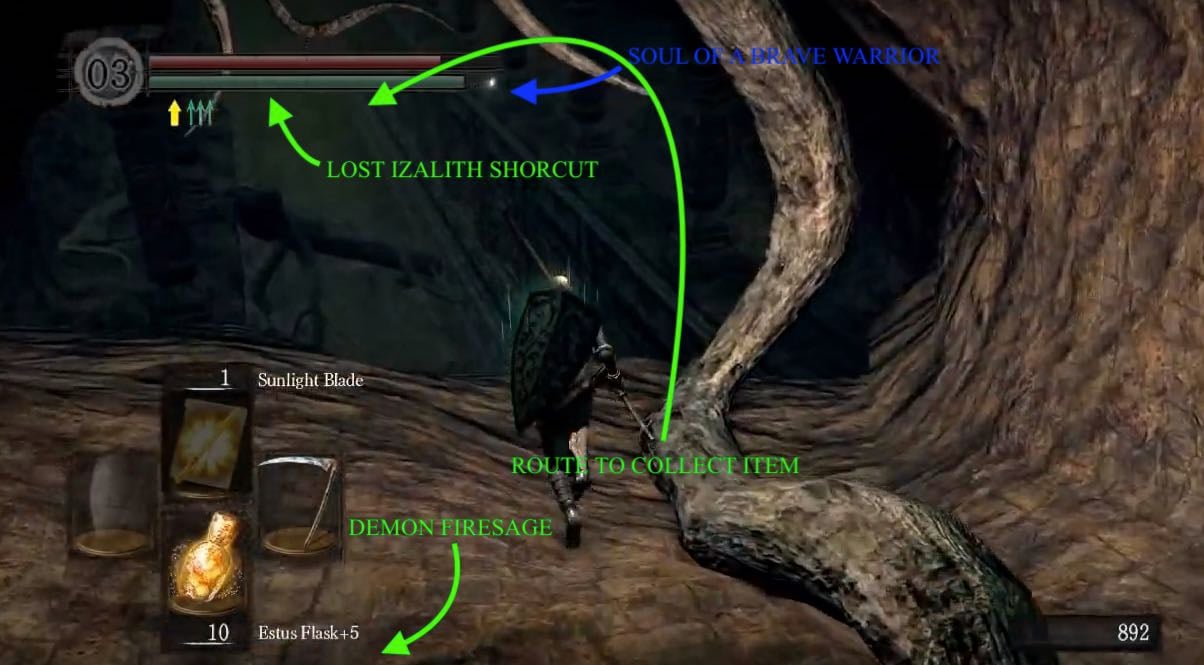
Perks - For this door to open, you need to be a level 2 Chaos Servant, which would cost you 30 humanity. Doing so has it's advantages though, as it will allow you to skip the Demon Firesage, Centipede Demon, and the whole lava section of Lost Izalith. Once the shortcut is unlocked, you have to find the red eyed Chaos Bug, you will know you got the right one as it will drop the Sunlight Maggot. If you killed the Sunlight Maggot before reaching this point, he will live, and become summonable just before the Gwyn fight.
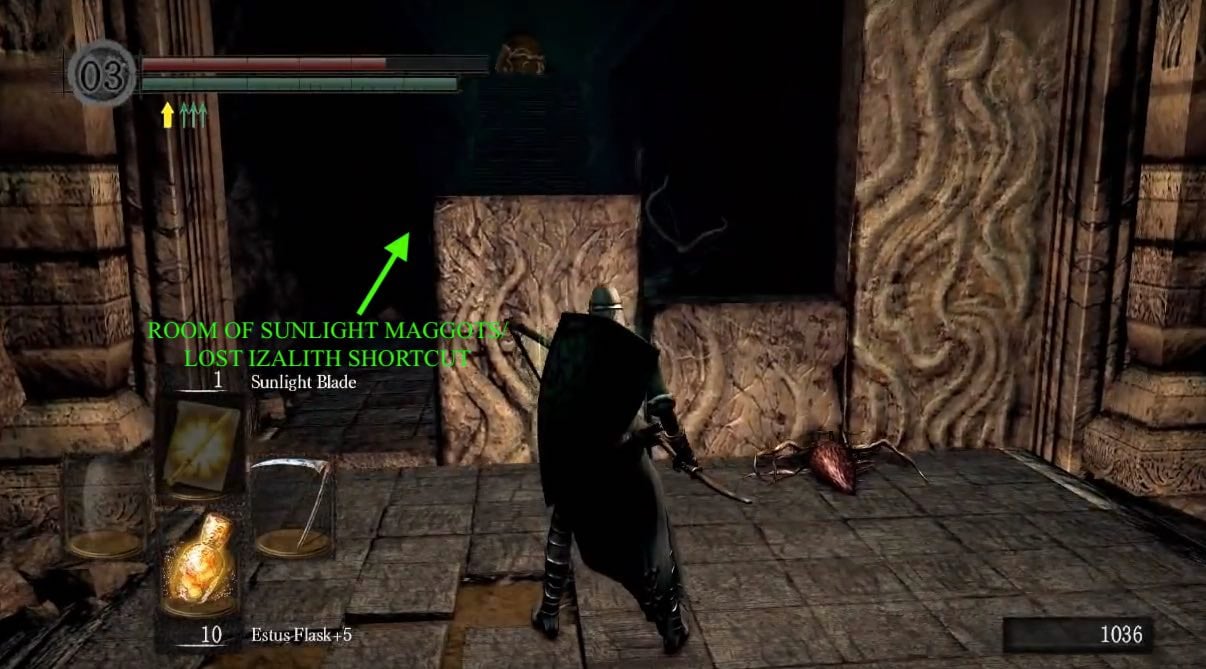
It is possible to do so without joining the Chaos Servant Covenant, however. Doing so requires a Pyromancy Flame and the Poison Mist pyromancy, which can be found on a corpse in the Blighttown swamp. Make your way to the shortcut door, and cast Poison Mist into the center of the door. It works best if you move yourself as close to the door as possible. Cast Poison Mist until you infect a mob on the other side.
Note: It's a good idea to kill all the Sunlight Maggots in the passage before entering Lost Izalith for a couple of reasons:
- After you defeat The Bed of Chaos, come back to the shortcut passage again and you'll find Solaire of Astora sitting down in it, all depressed about something, but the next time you see him he'll be available to summon for the final boss fight. If you don't kill them all then the next time you come back to the passage he'll be hostile toward you. (Please read here to find out more about Solaire's quest-line)
- There's a chance of them dropping a Sunlight Maggot helm, which will come in very useful later on in the The Catacombs and Tomb of Giants.
On the bridge there is a Titanite Demon - this particular one drops two Demon Titanite and also respawns - and a Crystal Lizard. and it ends at some stairs that lead down toward an area with a wealth of Stone Demons and a cavernous passage straight ahead. Take out the Stone Demons then head toward the passage ahead.
The Chaos Eater Pit
Down The Rabbit Hole - On approaching the cavernous passage you'll notice a corpse with an item inside. But beware that as you enter, the floor will collapse and fall away. Unless you somehow made it far across the floor before it collapsed, you will land on a platform directly in front of and above, a pit of Chaos Eaters. Head left to find a Chaos Eater on an out-of-reach platform, you should probably take care of.
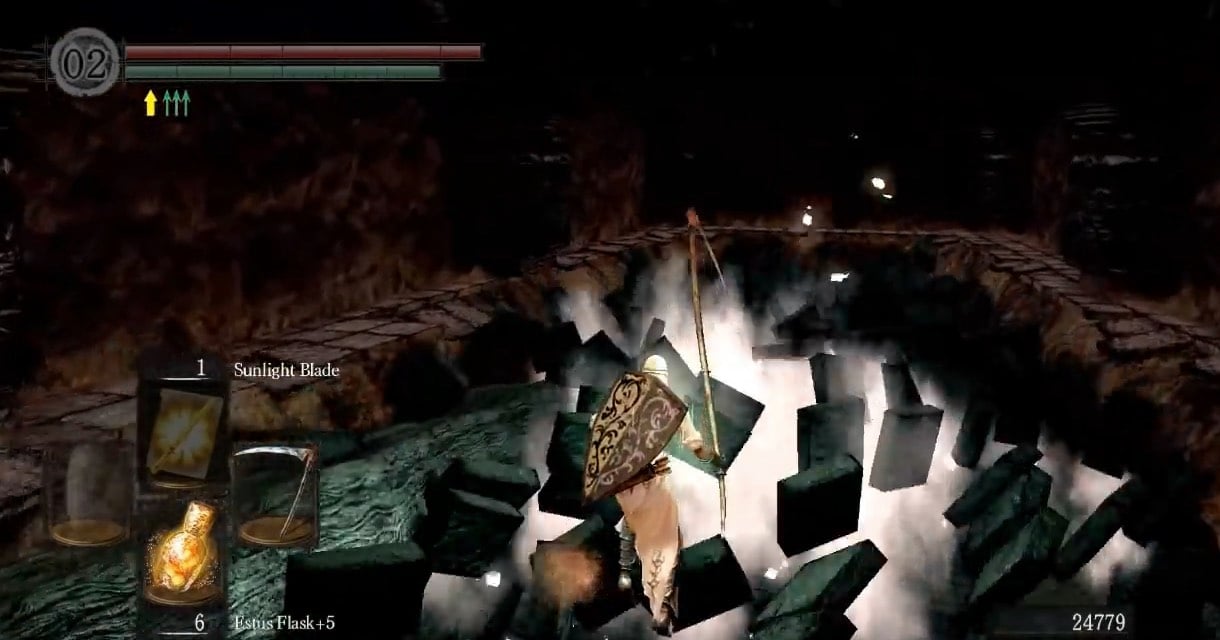
Unleash The Seig - If you have correctly followed Siegmeyer of Catarina's quest-line up to this point then you should find him standing over the pit, opposite to where you initially landed. Make your way around the left, to him, but do not talk to him before defeating all but one or two of the Chaos Eaters using ranged attacks to give him fair chance of survival, as he will attempt to repay you for all your help along the way by leaping in and taking all the Chaos Eaters down there. and you can also jump down with him and help with the fight to ensure he lives if you want. Also, make sure not to kill them all, as this will make him take his own life - see here for more on this.

Wet Feet - Be warned that the pit is covered in Blighttown-esque swamp water which slows movement and poisons you, so poison cures and the Rusted Iron Ring are advised to help getting around down here. Upon landing down here, you will find three items triangulated around you: 1 Red Titanite Chunk, 2 Green Titanite Shards, and a Soul of a Brave Warrior. Skirt around the large open shafts down here to find passageways beyond them - one of which is a dead-end with a chest holding a Red Titanite Slab. From this dead-end, you can head back and turn right, then left - traverse the sides of the two upcoming square pits - and then make another right turn, to find a set of stairs heading up to the location of the out-of-reach Chaos Eater; feel free to first explore the rest of the area for any more items.
Exploring the Izalith Ruins
When you get back to the top, take a right and follow the root path up to a junction with a choice of routes to take - one to the right with stairs, a doorway in the middle, and another one to the far left with root paths leading down. The path to the right leads to the boss, so we'll leave that for last.
Heroic Sacrifice - Follow the path on the far left, down the root to find yourself atop a bridge. The area is not very large and may still have a couple of Stone Demons in it but there's also a couple of items: a Soul of a Hero around the block - grab this first -, and a Rare Ring of Sacrifice on the lower ledge on the left. Once you drop down to get the ring, have a look below. This area is infested with Stone Demons, so prepare yourself, then dive in.
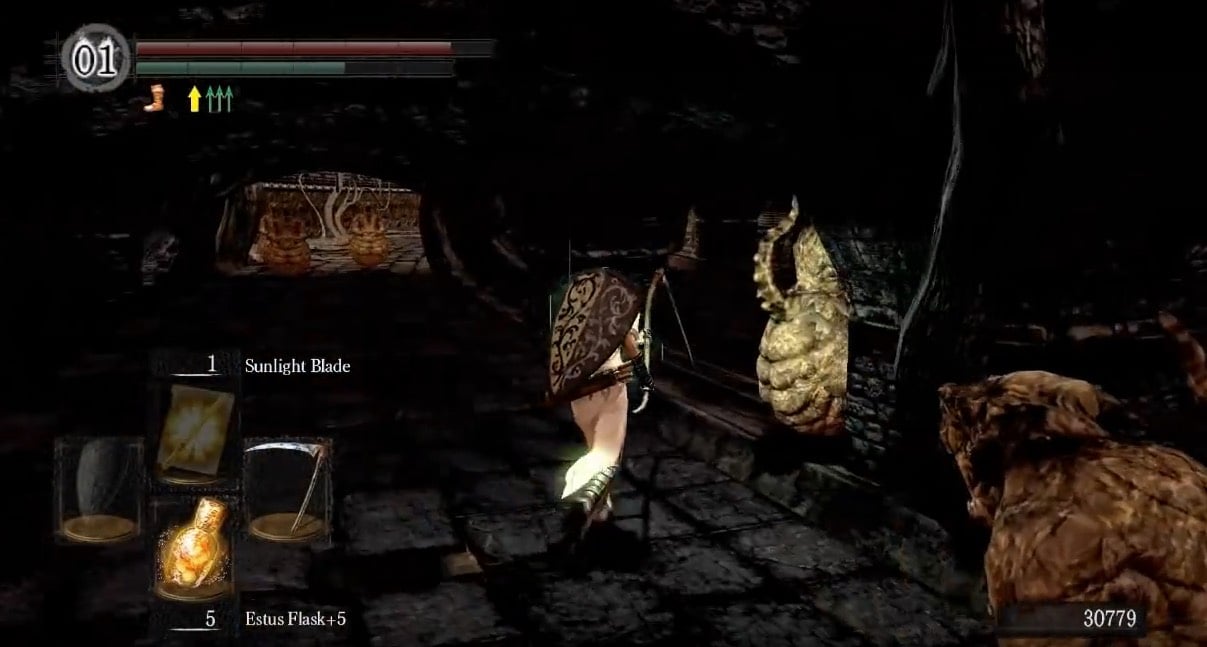
Stoned Army - Explore the area while disposing of as many as possible before going down to ensure you're not swarmed. On one end of the area, you'll find a giant root, this takes you into the Lava Lake of Lost Izalith, on the other end, are a flight of stairs. But before you go up these stairs, have a look to the left of the stairs to find a Large Soul of a Brave Warrior. Then as you climb the stairs you'll have to take on another Chaos Eater waiting at the top. At the top, go through the building and you'll find yourself back at the junction from earlier. Nowhere to go now but up the stairs ahead of you.
Bed Time
Daughter? - With all the above done, head back to the junction and walk toward the stairs on the left. Right as you begin to climb them a Daughter of Chaos - has a chance of dropping the Izalith Catalyst - will turn the corner up ahead and start attacking you. She wields some powerful Chaos Pyromancy spells, but shouldn't prove too difficult to take out. At the top of the stairs, you'll see the fog gate leading to The Bed of Chaos on your left, and more stairs going down ahead. Before going toward the fog gate, go down the stairs ahead to find a chest guarded by another Chaos Eater - the chest holds the Chaos Firewhip Spell.

Final Invasion - Return to the fog gate, and along the way, you'll be invaded by Knight Kirk if you are in human form. This is the last of his invasions, and given that you beat the him in the Depths and Demon Ruins already, you'll find his armor set near the Chaos Servant covenant bonfire after your encounter. Nothing left to do now but go through the fog gate, and slide into...

Boss Fight: The Bed of Chaos
Once you kill the Bed of Chaos you'll find yourself stuck in the small area that housed its heart, with only a bonfire for company. So, use the bonfire to warp out of there and back to Firelink Shrine to continue the main quest in The Catacombs.
Speed Run Walkthrough
A fast walkthrough of how to get to the end of the level the fastest, picking up only essential items goes here.Notes & Trivia:
- Solaire of Astora - Found sitting beside the first bonfire and then seen near the shortcut back to the Demon Ruins. Beware that he will be hostile at the shortcut unless you meet specific criteria; please see here for more information.
- Kirk, The Knight of Thorns (NPC Invasion) - If in human form he will invade at the fog gate to the The Bed of Chaos. It's the third and last of Kirk's invasions; please see here for more information.
- Siegmeyer of Catarina - Found in the room below the collapsing floor. What happens here determines how his quest line ends; please see here for more information.
- Daughter of Chaos - Attacks when you approach the stairs leading to The Bed of Chaos fog gate. Uses Chaos Fire Whipand Chaos Firestorm. (Note: This is not Quelana, even though it may look like her.)
- **Bounding Demon of Izalith** - Massive sets of dragon legs. There are a load of these in the lava filled section of the area. They can damage one another with their attacks and do not respawn.
- Stone Demon - The same as from the Demon Ruins, but beware that they appear in greater numbers in Lost Izalith. If you know where you are going, it is easy to just run past them.
- Chaos Eater - Found once you get out of the lava. They shoot an acid which will corrode your equipment if struck and their grab attack can kill in one shot. High chance of dropping Red Titanite Chunks and a much lower chance of dropping Red Slabs.
- Titanite Demon - Located on the bridge to the Demon Ruins shortcut. This one respawns and can hence be farmed for the 2 Demon Titanite it drops. (If farming Chaos Eaters for Red Titanite, it respawns only once - please confirm).
- Sunlight Maggot - Harmless bug enemies found in the passage of the Chaos Servant shortcut. Low chance of dropping Sunlight Maggot and Red Titanite Chunk. (Sunlight Maggot item drops only once per playthrough, and only from the one with the red glowing eye, they can also drop the Sunlight Medal.)
- Lost Izalith is the heir of Demon's Souls' Stonefang Tunnel. It was later succeeded by The Smouldering Lake of DS3.
 Anonymous
How to put bed into a context without any dirty mind i mean lets go :D

Corrected the Knight Kirk link to go directly to Knight Kirk rather than the improper redirect Kirk page.

 Anonymous
 Anonymous
A lot of people actually believe that Tomb of the Giants and Lost Izalith were supposed to be connected, good evidence for this is that enemies have a code / number that the game refers to them by, and the first numbers of this correspond with the area/level. The Titanite demon that spawns in lost izalith spawns with a 13, which corresponds to tomb of the giants, not Lost Izalith which corresponds to 14. This is what allows that particular Titanite Demon to respawn, it was likely moved whenever they ran out of the time / decided that connecting the areas was infeasible.
If you don't believe that they would move an enemy across that distance, you can look to the crystal golem that spawns in the Duke's Archives. When you first enter, climb the elevator and go inside, you'll notice him to the right. However, he wasn't always in that room. That crystal golem was actually all the way over in the open fields where the other crystal golems are right now, right before the crystal caves. He got moved with the Artorias DLC.
You can actually see your blood stain in lost izalith all the way from tomb of the giants, it's a trick of the camera to think they're that far away. They're actually pretty close together, and I wonder what it would've been like to go from izalith to the tomb of the giants.
 Anonymous
Who left the Oblivion gates open? It was you, Todditaka Howazaki!

 Anonymous
 Anonymous
Killed the bug using Poison Mist through the other side of the closed shortcut door, and Solaire didn't show up at all at the first Izalith bonfire. Was worried that I'd messed something up but when I got past the Titanite Demon, there he was, sulking, with the Sunlight Maggot item still there.

 Anonymous
Worst place with the horrible experience of loosing your two favorite NPCs in a 10 minute period of terror

 Anonymous
Does anyone know if you can access the shortcut if you haven’t opened it prior and killed the lady? (I was being a dumbass)

 Anonymous
Titanite Demon: (If farming Chaos Eaters for Red Titanite, it respawns only once - please confirm).
Confirmed, Patch 1.04/1.05
Killed it twice, no respawn after, better run for Red Titanite Chunks
 Anonymous
Thanks for the warning about the hole I fell through. Thank you so very much.

 Anonymous
 Anonymous
I died by titanite demon here. After respawned at the bonfire, I immediately run back only to be burned to death because I forgot to re-equip Orange Ring.
Lost quite a lot of souls too.
 Anonymous
 Anonymous
Btw, you only need to kill the bug that drops the sunlight maggot helm (not sure if you have to pick up the helm), killing the other bugs is not necessary to save Solaire.

 Anonymous
 Anonymous
 Anonymous
They should've just cut this area entirely. None of the bosses are good, the lava hurt your eyes, and the enemy placement is so bad that it genuinely looks like a mod made by a nine year old messing around in unity. This area is so horribly unfinished that it's only function in game is to bring down the overall quality of the experience.

 Anonymous
Welcome to the lasagna lake, this is where your eyes will melt

 Anonymous
For some reason you can warp into Seath's arena (not like anyone ever would like to come back into the crytal caveÖ but the furthest you can go to Lost Izalith is the Daugther of Chaos bonfire. Everyone hated on Dark Souls 3 for all those bonfires but I have no idea who thinks running miles with the grandpa speed of Dark Souls 1 should be considered "fun"

 Anonymous
I HAVE DIED TOO MUCH TO THAT ONE FUNKING TITANITE DEMON AND I'VE BEEN WALKING FOR 30 MINUTES

 Anonymous
Wow. Elden ring had alot of bs bosses with unavoidable damage and all that crap, but even that game doesn't get anywhere near this game this first half is making me consider dropping the game now. literally every boss has had some sort of stupid gimmick and the areas are all annoying atleast in elden ring it didn't matter how unfair the boss was because you respawned right outside the fog wall unlike this game having to run past 50 mobs, a swamp or a thin bridge just to get a opportunity to fight a gimmick unfun boss. But it's 10/10 because the map is connected. Brilliant miyazaki!

 Anonymous
 Anonymous
This titanite demon on the bridge is the hardest boss in the game.

 Anonymous
I could not access the Lost Izalith shortcut without the Lordvessel. I thought the elevator would be activated at Chaos Servant +2, but nothing happened; I confirmed status, did not leave the covenant or otherwise break it. I believe the game requires Lordvessel but this is not very clear except after gleaning some Reddit posts.

 Anonymous
From soft didn’t finish the area so I’m not finishing the com-

 Anonymous
Sunlight Maggot helm does not drop from solaire but from the red eyed bug in the same hallway where you kill him.

 Anonymous
The Chaos Eater can "Decimate your health" means to take a tenth. It takes way more than a tenth.

 Anonymous
 Anonymous
this wiki is a shitshow. but to that end, if you see a mistake, fix it yourself. no one officially maintains ANY of these pages and mistakes last for literal years. it's up to us, the community, to clean it up.

 Anonymous
 Anonymous
The walkthrough states that the bed of chaos is left at the junction, however it is to the right.

 Anonymous
I actually really love this area, one of my favorite, dunno why a lot of people hate it.

 Anonymous
A lot of people don't like this area, but honestly I just find it incredibly funny, if a little sad, because of the absolutely wasted potential.

 Anonymous
Quelaag isn't in Lost Izalith and Solaire doesn't kill himself! Have you played dark souls before??

 Anonymous
Even unfinished, I’m glad this place is still in the game. The concept alone of having a city with distinct architecture and culture so deep in the world is good enough to warrant its existence for me.

 Anonymous
"Also, make sure not to kill them all, as this will make him take his own life" ?? Where did you get that from? Why is that not on his normal page? It's not listed in his page in this website and also nowhere else. This is the first time i've heard this and if it's wrong, please fix.

 Anonymous
 Anonymous
This is the hell you go to upon death if you were the kid who made the "what what chicken butt" joke in 1st grade

 Anonymous
Well, after all this, I go to Chaos bed, kill two orbs, die myself and after I respawn and to boss again, this titanite demon appear again
Probably it's just bug place
 Anonymous
Just happens
Dark Souls Classic
First, I go to the pit and kill almost all chaos eaters (one left and I die)
Second, go to bridge, die several times again and kill titanite demon
Then go bonefire, go kill last eater
After that, I go to the bridge, and there was no titanite demon on it
 Anonymous
I don’t mind this area at all but I do feel a bit of sadness when I enter the lava field and think of the entire place in front of me being a giant complex city full of diverging paths and towers because I love the style of architecture for Izalith.

 Anonymous
I'm a level 2 Chaos Servant and the shortcut door isn't opening for me.
I've equipped Poison Mist and killed an enemy on the other side of the door and nothing happens. The instructions in the shortcut section are incomplete somehow.
 Anonymous
In the “bosses” section underneath the “NPC’s” section it lists chaos witch quelaag as the link. She’s the boss of blighttown, not lost izalith

 Anonymous
 Anonymous
There are 29 dragon butts. 29. That’s 29 spots in the lava field where you can enjoy being crushed face first into lava by something that shouldn’t really be alive in the first place. Admittedly, the area is quite chill if you defeat all of them and hang out in the aftermath.

 Anonymous
I’m being completely serious when I say the thing that bothers me the most about this area excluding the boss is the sound of running across the lava with the orange charred ring. Rather than have a lingering sound effect like poison it’s just a fire attack sound on repeat because the lava is treated like it’s attacking you each tick of damage rather than draining your hp like poison or toxic. Honestly annoys the **** out of me and it’s a relief every time I reach land.

 Anonymous
 Anonymous
Does anyone else have worse Frames here than in Blight Town? Blight Town ran without a single problem FPS wise, but this place... God. Feels like 15 FPS at times, while every other area in the game runs at 50 unless there's a lot of particles displayed at once.

 Anonymous
This is probably the most thematically immersive place in the game. You start out in the undead burg. There's sun, connections to beautiful places, plenty of living characters just hanging around. Then you come across a demon (Taurus) that seems sorta out of place.
Then you enter the lower burg. And as you venture down further, the setting becomes darker and more dismal. Thieves and hounds trying to bleed you. Then another, seemingly, out of place demon (Capra). You come across a couple of humans here, but they're barely alive, and need to be actively saved by the player.
In the beginning of the game, your aim is Blighttown. That's all you know about. So you get there, and it is, indeed, a pretty dark and treacherous place, filled with odd demonic monsters. And then you realize.
That whole path to Blighttown?
Yup, just the halfway point on the descent into the darkness. Soon all of the humans are straight up demons and you're wandering through this eerie and fickle hellscape, where the dangers are all-or-nothing threats.
Could the final area boss have been better? Yeah, sure. But this whole, long path from the burg to the Bed of Chaos is basically the most "Dark Souls" feeling section of the game, and maybe even in the series. That whole concept of a gradually deeper and darker path, with thematically similar enemies, as you progress was almost entirely lost in the second game--where most of the areas felt like disconnected/thematically discrete regions.
 Anonymous
Great place to fail 2 quest lines within 10min of each other LOL. Map design and unit placements seemed kind unusual.

 Anonymous
I love entering demon ruins and seeing the giant dome that houses Izalith below, the sheer scale of it blows my mind!

 Anonymous
Lost Izalith would have been a great place. The architecture reminiscent of Angkor Wat, the molten lava and the infernal atmosphere fit perfectly into the game. Unfortunately, this place seems so unfinished. As if the developers ran out of time and the finished project was dropped

 Anonymous
Developer 1: We don't have time to place the enemies and we got this big lava place what do we do?
Developer 2: Just put like 70 Demons there so they just avoid trying to explore the place
Developer 1: What about the boss?
Miyazaki: This game is a platformer.
 Anonymous
 Anonymous
This guide says the bounding demons don’t respawn, well the giant two legged stone monsters definitely respawned and *****ed me up

 Anonymous
I let ziggy jump down and he killed all the chaos monsters np. He's got gumption.

 Anonymous
The Titanite Demon in the shortcut respawns more than once, contrary to what the notes and trivia section suggest. Confirmed on PS4

 Anonymous
I took the shortcut before reaching the first bonfire to the left of the Centipede room and when I opened the door I found both Corrupted Solaire and the Red Eyed Chaos Bug... Is this some kind of glitch? By the way, I was playing the Nintendo Switch version.

 Anonymous
In the part with Siegmeyer, I had a divine crossbow +8 with me, seems to work really well against the Chaos Eaters.

In first playthrough in Lost Izalith both Siegmeyer and Solaire were taken. Damn this hollowed place.

 Anonymous
I always like saving him, even if it means an “incomplete quest”

 Anonymous
In the Siegmeyer part, I dropped after killing all but one of the monsters, but I had a Murakumo, so the backswing for killing the last one hit Siegmeyer and took a big chunk of his hp, thus ending the questline there :(. Be careful.

 Anonymous
This could've been a cool area but I guess, due to time constraints, they just filled the whole thing with lava and placed like 20 dragonbutts all over the level, then called it a day. Also one time I died to one of those things and had to spend 10 minutes looking for my souls, because they're almost impossible to spot in that giant pool of glowing awfulness.

 Anonymous
Does anyone know if they patched the titanite demon from respawning

 Anonymous
Everyone, DO NOT go in this area. It is pure hell, archers everywhere, you can't even retrieve your lost souls. And you can't go back to firelink shrine too. It's suicide if you go here. Beware, i guess.

 Anonymous
I might not sure if the outcome where solaire doesn't have the sunlight maggot is only for the shortcut as I got this outcome but never even joined the covenant. Things that I might have done are that I bypassed the gaping dragon by going through valley of the drakes and never saw him in blight town and I summoned him for ornstien and smough but he died in the fight.


the demons would be fun to take out one by one but even with the lava res ring the lava floor is ****ing annoying. Now that it doesnt do so much dmg still my armor cries about needing repair after a minute xD
0
+10
-1