

Anor Londo is an area in Dark Souls and Dark Souls Remastered. With its perpetually setting sun and gorgeous architecture, the city of Anor Londo will take your breath away upon your first sight of it, but don't be fooled by its apparent tranquility. Reachable via a small orange ring that appears after defeating the Iron Golem on top of Sen's Fortress, it's the home of Lordran's remaining deities and the Lordvessel- an essential artifact for completing the main quest.

General Information
- Previous: Sen's Fortress
- Next: Darkroot Garden/ Painted World of Ariamis
- Recommended Levels: 55+
- Bosses: Ornstein and Smough, Dark Sun Gwyndolin (optional)
Video Walkthrough
Anor Londo Map
(Work in progress)
NPCs in the area
- Darkmoon Knightess (Firekeeper)
- Giant Blacksmith (Ascends and upgrades lightning, crystal and boss soul weapons)
- Gwynevere (Covenant leader)
- Gwyndolin (Covenant leader)
- Siegmeyer of Catarina (Quest Chain)
- Solaire of Astora (Quest Chain)
Bosses
- Ornstein and Smough
- Dark Sun Gwyndolin (optional)
Items
Consumables
- Soul of a Hero
- Humanity
- Twin Humanities
- Large Soul of a Lost Undead
- Large Soul of a Nameless Soldier
- Large Soul of a Proud Knight
- Large Soul of a Lost Undead
- Purple Moss Clump
- Blooming Purple Moss Clump
- Soul of a Nameless Soldier
- Egg Vermifuge
- Divine Blessing
- Repair Powder
- Transient Curse
Weapons, Spells & Armor
- Black Iron Armor Set
- Havel's Armor Set
- Crystal Halberd
- Dragon Tooth
- Occult Club
- Havel's Greatshield
- Dragon Slayer Bow
- Gargoyle Tail Axe (dropped from Gargoyle tail)
- Hawk Ring
- Ring of the Sun's Firstborn
- Tiny Being's Ring (obtainable from NPC Siegmeyer of Catarina)
- Throwing Knife
- Painting Guardian Sword
- Silver Knight Straight Sword
- Silver Knight Shield
- Silver Knight Spear
- Dragonslayer Arrow
- Demon's Spear
- Giant Shield
- Giant's Halberd
- Symbol of Avarice
- Lightning Spear
- Crystal Halberd
- Occult Club
- Gold Coin
- Silver Coin
- Crystal Knight Shield
- Enchanted Falchion
- Dung Pie
- Prism Stone
- Copper Coin
- Gold Coin
- Silver Coin
Upgrade Materials
- Red Titanite Chunk
- Titanite Chunk
- Twinkling Titanite
- White Titanite Chunk
- Green Titanite Shard
- Large Titanite Shard
- Demon Titanite
- Dragon Scale
- Blue Titanite Chunk
Keys & Other
Enemies
- Sentinel
- Mimic
- Gargoyle (Lightning)
- Painting Guardian
- Bat Wing Demon (Imp)
- Silver Knight (wielding Halberd, Sword & Shield, Dragonslayer Great Bow)
- Royal Sentinel
- Titanite Demon
- Darkmoon Soldier
- Vagrants
Full Anor Londo Walkthrough
Starting out in Anor Londo
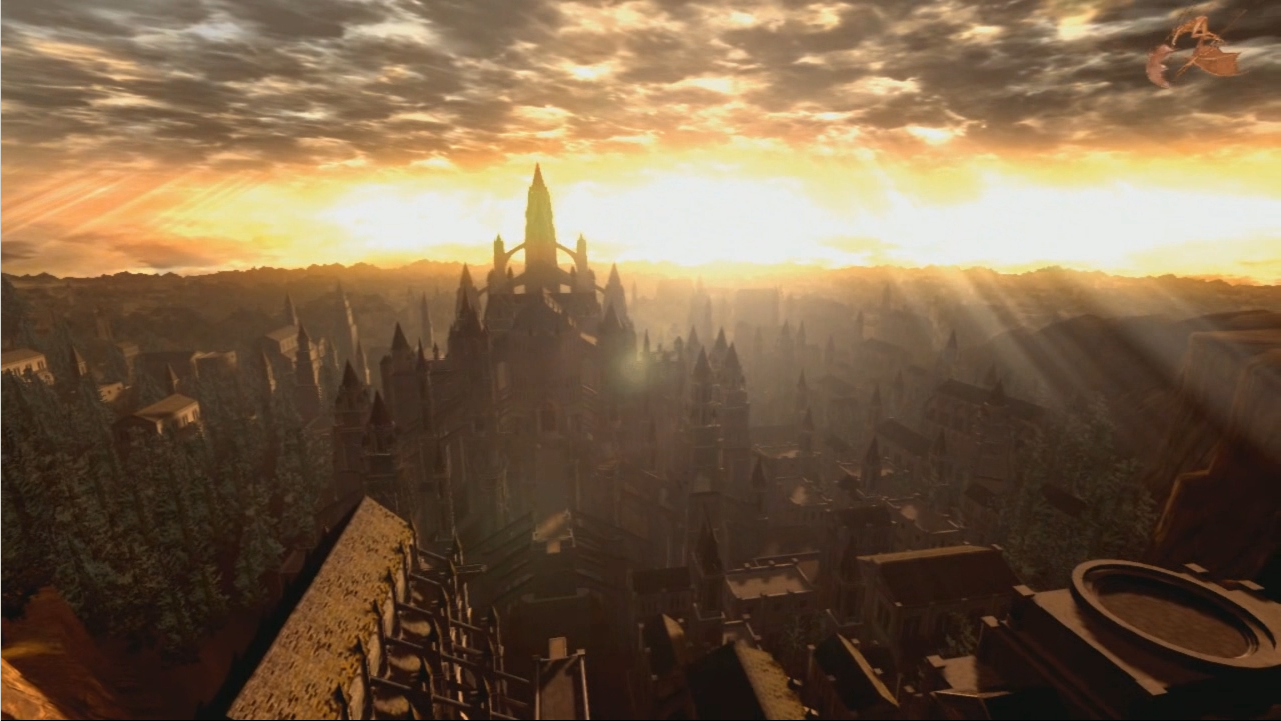
What A View - The Bat Wing Demons that picked you up from Sen's Fortress will drop you at the top of the stairs of the entrance to Anor Londo, with an amazing view. From here you'll see a massive cathedral taking up most of the view - that's where you'll be headed. Getting there isn't easy though, and getting inside is even harder. Follow the stairs down until you come across a Sentinel, don't worry them as they are passive unless provoked so keep your distance, and head into the door on the left. Through the door you'll see two more Sentinels to your left with a chest behind the one on the right. Head right, through the door into the giant courtyard.
Exploring the Courtyard
Dark Moon Bonfire - In the great doorway on the left, you'll find the Darkmoon Knightess next to a bonfire; she is a Fire Keeper so her presence here allows this bonfire to refill 10 Estus Flasks right off the bat, no kindling required. You can kill her for a Fire Keeper Soul if you wish, but doing so will disable this bonfire for this play-through, even though you can still spawn there after death. She is aligned with the Blade of the Dark Moon covenant, so if you want to stay on her good side it's advised to avoid betraying them too.
Go back up to the giant courtyard, and head back into the building containing two Sentinels with a chest behind one of them. The Sentinels will fight you if you approach them but they can be taken out without getting their attention if you stand far enough away and use a bow. Alternatively, if you take them on, one at a time in close-combat, they're not too much trouble as they turn slowly and can be rolled through as well. Just keep an eye out for their very long range and nearly 360-degree halberd sweep attacks, which can strike players even behind them. Access the chest to find a Demon Titanite.
Mimics and Chests - Once you're done, head through the courtyard into the great doorway, straight ahead. You'll find a hall with another two Sentinels, this time guarding two chests. The chest on the right is a Mimic - defeat it for a Crystal Halberd or just leave it alone. The chest on the left contains a Twinkling Titanite. You'll likely notice a doorway on the right side of this room with another Sentinel guarding a staircase behind him, but this staircase leads to the golden fog gate - The Duke's Archives - which is inaccessible until you place the Lordvessel - which you will collect after completing Anor Londo.

After this, make sure you have full Estus Flasks and then go down the elevator that's through a small tower, opposite the bonfire room.
Beyond the Courtyard & Entering the Chapel
Walkways - Make your way down the spiral staircase to confront a Gargoyle on a walkway; similar to the one you fought on the roof of the Undead Parish, only this one is smaller and breathes lightning instead of fire. You can cut off its tail which rewards you with an easier fight and a decent axe. Cutting it off will also give you a small window of free shots as he roars in anger/pain. Kill the Gargoyle, and it will remain dead, as your journey in this direction; the walkway you fought the Gargoyle on leads to a sheer drop.

Head back towards the building you just came from and you will see a staircase on the right of the building. Drop down onto it and continue right, under the walkway, until you reach a chest with a Demon Titanite inside.
Into The Chapel - Head back to the bottom of the stairs and you will see a flying buttress on your right that you can walk up - if you're having trouble finding it, let the Orange Guidance Soapstone be your, well, guide. Proceed with caution to the top and then roll on to the balcony to the right (Note: It is generally easier to roll off the buttress onto the balcony below if you do so at an angle, rather than going all the way up the buttress and then trying to roll straight forward onto the balcony). You'll notice a broken window on the balcony leading into the chapel and once you walk through it, a Painting Guardian drop down and engage you. These guys move and attack like the thieves in Lower Undead Burg in combat, so avoid turning your back on them. Another will engage you from the other side of the room before you continue up the ladder on the left.
The Chapel Rafters
Atop The Chapel - The objective is to make your way across the other side of the chapel by walking along the rafters. Be careful! A fall from this height will kill you, regardless of your vitality or anything else, and that is only made more difficult by Painting Guardians ahead, as you go along. There's a few ways you can deal with these:
- Their throwing knives at a distance can be blocked with your shield up which will eventually force them to engage you hand-to-hand. Wait on the other side of a corner from them while they approach to see them fall through the rafters, to their death, when they try to attack at the junction.
- Alternatively, you can range attack them or fight them at the junctions where you can get a little bit of room to work with.
- Another option is using straight line attack weapons such as spears or thrusting swords, which should prevent you from moving laterally and falling.

At your first encounter with a Painting Guardian, you'll find them standing at a chandelier with an item on it hanging by a chain from the ceiling. DO NOT jump down onto the chandelier - its chain will break and will send you falling to your death. Cut the chain of the chandelier instead to drop it for your safe retrieval later.
Once you reach the end, climb down the ladder on the right to reach a fog gate. To the right of the fog gate is a Painting Guardian in a narrow and enclosed stairway. Head back to the ladder and drop down onto the ledge where the three statues are. Run to the other side of this ledge and jump through the columns (you need to have good aim and timing here). Continue left and halfway up the stairs you will find another Painting Guardian, in yet another cramped stairway. Continue onwards to find a chest with Divine Blessing inside. Drop back down to the ledge with the three statues again and use the same method as before to jump through the columns below the original side you were on to return to the fog gate, through the first narrow stairway.
The Staircase Tower and Darkmoon Tomb
Easy Access - Enter through the fog gate and to reach the outdoors again. Continue across the bridge ahead to find yourself at the top of a tower with a spiral staircase and a rotary lever. Turn the lever counter-clockwise and watch a cinematic, showing the capability of this staircase tower to rotate and elevate. The end of the cut-scene brings the beginning of another fight with a Gargoyle. Once defeated, turn the lever counter-clockwise again to bring the tower further down.

Tomb Raider - Head down the spiral staircase now and over the bridge to a new room where you will find the Darkmoon Tomb bonfire and the Ring of The Sun's Firstborn.
Note: The large statue at the back of the room hides a secret staircase, if you have the Darkmoon Seance Ring equipped. At the bottom of the stairs you'll find a spot where you can kneel before a fog gate and converse with Gwyndolin, who will be able to induct you into the Blade of the Dark Moon covenant. Alternatively, you can take him on as an optional boss fight. So, if you've defied the odds and have already been to the Catacombs and gotten the Darkmoon Seance Ring, then go right ahead. Otherwise make a note of the area and move on - you can come back here later in the game once you obtain the Darkmoon Seance Ring. Do NOT enter the fog gate unless you wish to fight Gwyndolin.
The Chapel Floor
Back To The Chapel - Go back out, up the spiral stairs, turn the rotary lever clockwise to make the tower go up and then head back down the stairs where you can enter the ground floor of the chapel you traversed earlier, along the rafters. In here you will encounter a decent amount of Painting Guardians that are easily dealt with - if you stick to luring them out one by one. Eventually you will arrive at the fallen chandelier from earlier to claim the Sorcery: Great Magic Weapon.
Alternate World - On the left corner of the chapel there is the Black Iron set, a Greatsword, and a Black Iron Greatshield. Finding these items will also mean you've found the large painting on the wall. This painting, if examined, will take you to the Painted World of Ariamis if you've revisited the starting room in the Northern Undead Asylum to acquire the Peculiar Doll.

If you choose to enter the painting, you will not be able to leave until you reach the boss at the end of the Painted World of Ariamis. Once you're done in here, head back outside and up the stairs where you'll see two paths: one leading to the walkway where you fought the first gargoyle from earlier - this opens a shortcut to avoid traversing the chapel rafters again - and the other going toward a large staircase that leads up to the cathedral.
Infiltrating the Cathedral
Big Boys - At the top of the large staircase, you'll reach the Cathedral's main entrance with two Sentinel guarding the door - lure them one at a time or alternatively, if you stand centrally near the top of the steps you should be able to just see the left Sentinel's head over his shield; you can kill both Sentinels from here with a bow and they won't even move to attack you.
Batmen - Once they're dealt with, face the cathedral and you'll notice the entrance door straight ahead which can only be unlocked from the other side, there's also a small locked door to your left (with the same problem) and an small open door to the right. Go through your only option and you'll find stairs to your right, leading down to a ledge with three Bat Wing Demons. The easiest way to dispose of them is to fight them on the edge of a platform and knock them off, they have very low poise and any hit will push them backwards. The Emit Force miracle may come in handy here.
Alternatively, when you go through, you can go to the left, and slowly drop down onto a thin ledge. Take a batwing demon with you, and it will fall down, while you stand in a safe spot.

Once you have dealt with the three of them, on the left side of the ledge you'll find a flying buttress leading down. At the bottom there are two more Bat Wing Demons hiding behind the pillars on either side of you. Unless you're confident in beating them swiftly, lure them back to the buttress and deal with them there. The alternative is to ignore them - make sure you're completely healed up - and bolt it up the next flying buttress, on the left.
Test Of Your Patience - There are two Silver Knight Archers up on far away ledges firing at you with Dragonslayer Bows - these will knock you back (and probably off the platform) if you get hit. The Ring of Fog (or Hidden Body sorcery) could come in handy, in this section as the archers wont be a threat until you are closer. Try one of the strategies below, which ever suit your character build and play-style better:

- Method 1 (for melee builds): Equip and two-hand a greatshield (or if you have high enough STR, simply equip a greatshield). Sprint up the roof arch toward the Silver Knight's position, go left around the structure in the center and then run up the next arch to the top. Quickly turn right and follow the narrow ledge toward the Knight, rolling (facing the wall) when he fires arrows to dodge them. Keep your shield up, get right up close and lock-on to him to ensure you're always facing him and he'll switch to a sword. As his attacks deflect, he will fall to his death off the narrow ledge. Now go back to the arch and go left to take on the other one using the same strategy - over here you will find a Soul of a Hero.
- Method 2 (for archers): Poison Arrows work well. Two hits close together are usually enough to poison an enemy. If you're standing in the right spot on the first flying buttress, before the midway tower. While there are spots in this first buttress that allow for protection from theSilver Knight Archers' arrows, the arc of your arrows will allow you to hit them! The poison effect can apply and deal fatal damage even if you are too far away for the arrow impact itself to do any damage. Poison both of them, and let them die. This also works on the Sentinels, who won't attack unless you're quite close to them. If you don't have Poison Arrows, you can acquire around a hundred poison arrows for 10,000 souls from the Female Undead Merchant at the Lower Undead Burg.
- Method 3 (for magic builds): Equip a shield and your lightest armor and sprint up the buttress, and stop to replenish your stamina at the midway structure. By sprinting you should not take any damage from the snipers. Wait until the snipers stop shooting and then run around the structure and up the next section of the flying buttress with you shield held aloft. Head right at the top and wedge yourself between the knight and the drop. If you have the the Soul Mass spell (available if you rescued Big Hat Logan), equip this before you reach the top of the buttress Two of the orbs get knocked off by the building but it hurts the sniper without having to worry about the controls at a time you can easily fall. As a magic user, this section is hard but achievable if you focus on speed and movement - Soul Mass helps immeasurably.
Method 3.1 (for magic builds) Get past the archers by sprinting up to the midway structure. Wait until the archers stop firing arrows at you. Equip the Lingering Dragoncrest Ring and then cast Hidden Body. Walk as fast as possible without drawing the attention of the archers around the central structure and up the buttress until you can lock onto the archer on the right. Then hit him with your heaviest hitting spell, like Soul Spear.
- Method 4 (Hybrid builds): Equip your spear, and your shield with the highest stability, and be sure to be below 50% weight. Equip the Lingering Dragoncrest Ring or Ring of Fog. Sprint up the buttress to the mid point tower. Wait for the archers to stop shooting. While still out of their view, cast Hidden Body if you don't have the Ring of Fog, and quickly Switch back to your melee weapon before you run. Quickly, move around the tower, and up the second flying buttress. At the top, hold your shield up, move quickly over to the archer on the right. Stay in that corner before the curve, the archer will switch to sword. His engagement will likely result in his plummet, if not, use your spear for encouragement.
- Parry method (all builds): Equip a good stability light or medium shield you can parry with, and the Dark Wood Grain Ring. Advance to the midway structure, and then up the next walkway. Do not stop; if you are moving properly all arrows should miss you along the way. Once at the top, immediately roll your way to the Silver Knight Archer on the right, dodging anything he shoots at you and particularly to reduce the odds the other knight shoots you in the back. As you approach, the knight should switch to his sword and shield. Block and wait for him to swing at you, then parry and riposte him; the best time to do this is after he shield bashes you, which he always follows with an obvious, slow right hand sword slash that is easily parried. With a sufficient weapon you should be able to kill him with the riposte while the other archer is unable to hit you. You may then proceed around the edge, or backtrack to kill the other archer in whatever way you wish. You may also accomplish this, blocking arrows instead of rolling, but this is more dangerous as the blocks will slow you down and may knock you off. With a little practice at parrying this is one of the easiest and fastest ways to get through this trouble spot. If for some reason the knight refuses to switch to his sword and shield, use the corner of the curved catwalk as protection from his arrows and stab him in between shots by moving forward slightly then retreating. You can also hit him with various spells or miracles from there.

Once the Knight on the right is gone (at the very least), follow the ledge to the right and drop down onto the balcony below to enter the fog gate.
Inside the Cathedral
Rest With An Old Friend - Once through, you'll be in a corridor with a door on either side, and a spiral staircase at the end. Enter the door on the left first for a well-deserved break at a bonfire with Solaire of Astora, instead of heading right and having to frustratingly face a Silver Knight, after dealing with the hell that was the Silver Knight Archers. Once you've had your rest, it's time to get frustrated. The Silver Knight (Spear) guards a chest behind him holding 3x Sunlight Medal. Head back out the room and behind the spiral stairs to find another Silver Knight guarding two more doors. Deal with him and proceed to the left door - the other one's locked from the other side.

Become The Rock - In this room you'll find a fireplace that has reveals a secret passage, after being hit. Follow the resulting stairs down to find yourself in a very dark room with 5 chests, one of which is a mimic. The mimic can be easily identified as being the only one that is sitting alone - every other chest down here will have another chest right beside it. The four regular chests will contain Havel's Set, the Dragon Tooth, and Havel's Greatshield. Killing the mimic grants you an Occult Club. Now go back out to the corridor and climb the spiral stairs.

At the top you'll see two doors: The one on the right contains nothing, while the one on the left contains a Silver Knight and a Soul of a Hero. Look down over the balcony in this room to find a Titanite Demon on the floor below (Tip: You can target the Titanite Demon from up here and if you find the right spot, killing him with ranged attacks, saving you a lot of hassle later. This will also remove a favorite tactic by PvP invaders, namely hiding in the Titanite Demon's room to either lure you into a difficult fight, or so that they can run up behind you when you bypass them and try to make it to the main cathedral.). Heading back towards the staircase you just climbed, you'll find a Mimic in both corners of the room; one's holding a Gold Coin and the other's holding 5 Silver Coins.
Rooftop Courtyard - Walk around the staircase to find a corridor with a door on either side and a Silver Knight Archer in the doorway at the end - zigzag up the corridor to dodge his arrows and take him out, there's nothing on the balcony behind him but a nice view. The door on the right is locked from the other side but the left door goes into a bedroom and into an ambush; a Silver Knight will jump you from the right side of the door. From here, go up the stairs to find the rooftop courtyard and immediately you'll notice two Silver Knights; an archer on an archway at the other end of the courtyard, and a regular one at the doorway on the left. Stick to the railing on the left as you approach the Silver Knight, staying clear of the range of the archer. After you deal with the first one, proceed to zig-zag the archer and take him on. Head back and into the doorway the other Silver Knight was guarding.

Aiding Siegmeyer
NOTE: If you're in a hurry/ worried about invasions, you can skip this area by not talking to Siegmeyer, or entering the room, and head back to the courtyard. He will remain here until you come back and help him, regardless of your progress in Anor Londo.
That's What Friends Do - At the bottom of the staircase, you'll find Siegmeyer of Catarina, again. Exhaust his dialog set to learn of his plight, in that he can't go any further due to the enemies in the next room. Being the great you are, you're going to take them out for him; whether you speak to him prior or not, you're still doing him a service and will prompt the same response if you talk to him after you've cleared the room.
In the next room you'll encounter 3 Silver Knights, the first of which is on your immediate right waiting in ambush, as soon as you open the door. Lure him back out the room but ensure you don't aggro the other Knights in the room, or accidentally hit Siegmeyer during the fight. You can also parry and riposte him in his corner, or even kill him through the wall (either near Siegmeyer, or from the hallway) with a sufficiently large weapon. Lure out the other two Silver Knights - one-by-one if that wasn't clear - in the room with ranged attacks and then kill them as well. Next to the bed, there's a chest containing 2 Demon Titanite and the door here leads to a corridor from earlier.

If you speak to Siegmeyer of Catarina after the room is cleared, he'll thank you and reward you with the Tiny Being's Ring. More importantly, he will also move onto Firelink Shrine, where if you speak to him and tell him the part you played in opening the gates, he will reward you with the useful Emit Force miracle. Now head back up the stairs and across the rooftop to the archway where the Archer was.
Inside the Cathedral - Wrapping Up
Options - Head down the long spiral stairway and at the bottom you'll see a door on either side of the corridor, and a long stairway straight ahead. The door on the left contains the Titanite Demon - he can be a tough fight in close-combat but if you killed him from the balcony earlier then you can just go in a collect your prize - 2 Demon Titanite. If not, a good strategy is to whittle him down by darting in to do damage, then darting out to use the hallway as a safety zone to heal.
If You Can't Beat Em... - The door on the right leads to a stairway heading down into a room with two Silver Knights (Spear), one will engage you as soon as you start heading down the stairs, on the other side of the room. The other Silver Knight is guarding two chests containing the Silver Knight Set. The doorway down here is a nice shortcut back to the floor with the bonfire. Head back up and go straight up the long stairway.
Shortcut: There's a cheeky shortcut, on the first spiral staircase you can take from outside the bonfire room. There's a gap that you can jump through to end up at the corridor we are about to go to, skipping over any battles, if you've used the bonfire and prefer not to fight the Silver Knights all over again.

The Main Hall - Once up at the top you'll be up on a side balcony of the Cathedral's entrance hall. If you look around you'll see a Silver Knight Archer on the balcony on the opposite side of the hall and two Royal Sentinels down below on the ground floor - fight them later but be sure to find the giant doors at the end of the room, and once you do, you should also find a rotary lever that opens these doors; getting the doors open may come in handy for this next part. On the balcony, continue up the set of stairs on the left side and you'll eventually notice a broken window you can go through.
When Life Knocks You Down - If you pass by the broken window and keep following the wall around you'll find a passage on the left with a stair case leading down - this leads directly to the Giant Blacksmith - but going through the broken window reaps greater rewards. Through the broken window, you'll find large steps you can descend. Continue on the small ledge turning right to find a small, fenced platform. Get as close as you can to the wall and drop down into the area to claim a Dragonslayer Greatbow and Dragonslayer Arrow.
Outside the Cathedral
There is a gap in the fencing here that you can walk through, and drop down to an area with a few Bat Wing Demons, ensure you've healed up since it's a long enough drop. If you look around before you drop, you should be able to spot three Bat Wing Demons; one on the right, another on the left, and one straight ahead beside a doorway, of where you will be landing. You'll find another Bat Wing Demon to the left down some stairs on a ledge. Down on the ledge you'll find a corpse with a Titanite Chunk, and if you look to the right as you're coming back up you'll see a door that leads back to the main entrance - opening a very welcome shortcut.
Big Help - The doorway mentioned in the above paragraph leads to the Giant Blacksmith. You'll likely notice the chest that he's blocking access to; it contains the Hawk Ring. Killing him is very much ill-advised as he's the only one who can ascend a weapon to lightning status, make Boss Soul Weapons, and he also sells a variety of titanite (including the otherwise very rare Twinkling Titanite, following patch 1.05). To get to the chest, as you can approach along the left wall and continually roll/push forward and wedge yourself in beside the Giant until you get a prompt to open the chest. Sometimes the Giant Blacksmith will shift position slightly to either block or allow you to reach the chest. Just be patient and wait for him to move his arm again and you will be able to move past him. If you do accidentally attack him, instead of killing him, return to the Bell Tower in the Undead Parish and absolve your sins with the help of Oswald the Pardoner.

Note: PvP invaders may attempt to lure you into fighting or killing the Giant Blacksmith in order to make your play through harder, so avoid any fights in his workshop. It is often better to let yourself be killed than risk killing him.
The Entrance Hall
Proceed up the lengthy stairs beside the blacksmith and you'll be wound up on the side balcony of the hallway. Take a left here and go down to kill the Silver Knight Archer on the balcony before taking on the Royal Sentinels on the ground floor. You don't want to go down and take them both on at the same time, so try to get rid of them with ranged attacks where possible. You can also lure them on to the steps and plunge attack them for good damage.
2-For-1 - Also worth noting, you can summon Solaire of Astora - if you're in human form - on the stairs down from where the Archer was. He'll help greatly both with the Sentinels and with the boss battle ahead. Once they're gone you'll see the fog gate that leads to the boss battle, but unlock the main entrance door on the other side of the room by pulling a lever on the left of the door - opening up another shortcut - before you enter . When you're ready, head through the fog gate and get ready for a fight.
Boss Battle: Ornstein and Smough

IMPORTANT:
- You will have to fight two very difficult opponents, one with lightning damage, the other with hard hitting AOE attacks.
- THE SECOND PART OF THE BATTLE:
- Killing Ornstein first will trigger a cinematic showing Smough absorb Ornstein's power, buffing him as well as, granting him lightning damage and some of his move set.
- Killing Smough first will trigger a cinematic showing Ornstein absorb Smough's power, buffing him as well as. granting him a substantial increase in size and some of his move set.
- You will be able to purchase the armor of whoever you killed last at Firelink Shrine under the aqueduct, leading to the Upper Undead Burg.

Princess Gwynevere and the Lordvessel
The Princess - After killing the bosses you will be able to access the elevators in the corners at the back of the boss arena. Up them, you'll notice a bonfire and to the left, a large door nearby leading to the chamber of Princess Gwynevere. She will give you the Lordvessel, allowing you to now warp between selected bonfires, and guide you as to what's the next step in your quest. She will also offer the ability to join the Princess Guard covenant.

Note: You may now kill Gwynevere if you want, but be warned that there are a series of quite serious consequences for doing so:
- You will be unable to join the Princess Guard and covenants (although you will be able to access the Blades of the Dark Moon again if you absolve your sins with Oswald of Carim).
- The Darkmoon Knightess (the Firekeeper of Anor Londo's first bonfire) will become hostile and engage you when you meet her next at the base of the stairs leading up to the Cathedral, and killing the Knightess will disable her bonfire for this playthrough.
- Anor Londo will now be permanently darkened after Gwynevere's death and the Royal Sentinels in the entrance hall will be replaced by some tough human NPCs.
- If you are in human form while journeying through the darkened city for the rest of the playthrough, you can expect to be continuously invaded by members of the Blade of the Darkmoon covenant, who will attempt to make you pay for killing Gwynevere.
Therefore, killing her is not advised unless you don't mind a gloomy Anor Londo, and have no desire to join or stay on good terms with the Blade of the Darkmoon convenant, or wish to engage in PvP against Darkmoon invaders in Anor Londo.
NOTE: If you don't mind any of these consequences and intend to kill her, but also wish to down Dark Sun Gwyndolin, it is strongly recommended that you kill him first. If you die to Gwyndolin when Anor Londo is darkened, it is a much longer trip to get back to his fog door.
Retribution for Anastacia
Now, if you are in the unfortunate position where Anastacia of Astora (ie. the Firelink Shrine Fire Keeper) was killed by Knight Lautrec, you should now take the opportunity to resolve this by going back down the to the hallway before the boss arena (killing the Royal Sentinels again if necessary).
Lautrec The Guilty - Use the Black Eye Orb - you should have picked it up from her cell in Firelink Shrine after she was killed - here to invade the same hallway in Knight Lautrec's world, as a Spirit of Retribution to fight him and two other human NPCs. One is a mage build, and the other is melee build. Focus on killing Lautrec as the other two do not need to be killed to be successful in the invasion - however if it gets too challenging, fighting three people at once, target the mage then proceed to Lautrec. Once you take vengeance on him you'll collect Fire Keeper Soul and you'll be transported back to your world.

Head to the bonfire directly outside Princess Gwynevere and before using your new warp ability to go to Firelink Shrine, head left and acquire the fallen Lautrec's armor.

Back At The Shrine - Once you're back at Firelink, you'll notice Siegmeyer of Catarina standing near the bonfire - if you cleared the way for him earlier. Let him know it was you who helped, and he'll reward you again for your assistance with the Miracle Emit Force. Now pay a visit to the cell where Anastacia used to sit, and use the Fire Keeper Soul acquired from Lautrec to bring her, and the Firelink bonfire, back to life. She'll be able to talk once resurrected, but she won't have much to say until you place the Lordvessel.

Crossroads - What to do with the Lordvessel?
There are now two options for how you would like to proceed. The choice you make here determines whether you'll be able to discover the Darkwraith Covenant or not, and unlock the game's alternate ending:
- Option 1 - Ignore the Darkwraith Covenant: Head over to Kingseeker Frampt in the Firelink ruins and speak with him. This will trigger a cut scene and he'll take you down below to the Firelink Altar where you can place the Lordvessel and open the various golden fog gates in Lordran. Frampt will then give some further instruction on what to do next to continue with the main quest, and will return you to the surface if you select his warp option. You can now trade with him again once you're back up top. When you're ready, go to Blacksmith Andre in the Undead Parish and proceed from here to the next area: Darkroot Garden. Talking to Frampt makes it impossible to find Darkstalker Kaathe later in the game, and hence will not allow you to join the Darkwraiths during this playthrough or be able to get the alternate ending.

OR
- Option 2 - To Allow You to Find the Darkwraith Covenant: Ignore Frampt completely and head directly to Blacksmith Andre, then proceed to Darkroot Garden. Ignoring from this point on will ensure you can find Darkstalker Kaathe in New Londo Ruins once you defeat the area's boss, but following this path to it's conclusion guarantees the wrath ; he disappears and ceases to provide his services of trading items for souls or breaking-down titanite, for the rest of this play through. (Note: The scene below only appears at the end of the game)

Whichever option you choose, your next destination is Darkroot Garden to obtain the Covenant of Artorias.
Farming Silver Knights
The area right around the last bonfire is great for farming Silver Knights. There are approximately 12 of them between each floor and for 900 souls each, that's an easy 10k souls for about 5 minutes worth of work! Using a powerful melee weapon (lightning claymore +5) and a shield, you can block their attacks and simply strafe around them in a circle until you get a backstab. If your weapon and Strength are high enough, you can usually 1-hit them with a backstab. The weapons they occasionally drop are pretty powerful too, although require high Dexterity to wield.
Soul Farming
If a player kills Princess Gwynevere, Anor Londo will plunge into darkness. All mobs, except the Silver Knights and the Painting Guardians, will despawn and no longer be available in the current play through.
In the hallway leading up to the church (just before door to the Ornstein & Smough room) there will be two Giant Knights, both worth 3000 souls (first play through). These knights DO respawn. All in all, they are worth 6,000 souls per minute; jump down from bonfire, heal, run out and kill them, teleport to bonfire and repeat.
Alternatively, you don't necessarily need to jump all the way down, since as soon as you load at the bonfire, if you run to the lift to the right (your right if standing at the bonfire and facing Princess Gwynevere's room), the lift will reach the top as soon as you get there every time.
Soul Farming (After completing the Crystal Cave)
Another method for soul farming requires a high Intelligence (>50), Crystal Soul Spear, Soul Spear (X2) and Homeward. From the last bonfire before you fought Ornstein and Smough, equip your catalyst (Logain's Catalyst is preferred) and select Soul Spear.
- Run out the door and go to the left around the stairs. Kill the Silver Knight behind the stairs, and the 2 Knights in the room to the right using 2 Soul Spears each (1 breaks their guard, while the second kills them).
- The last Silver Knight can usually be killed with a single spell, as he doesn't react when you enter the room.
- Run up the stairs and head to the right into the hall before the boss. Select Crystal Soul Spear and run down to the first landing, then run back up the stairs and face the hall.
- You will see that the two Royal Knights will approach you, however to reach you, they will walk up the stairs, exposing their backs to you. Target them before they reach the landing and kill them with 1 Crystal Soul Spear each. From here, can run over to the other staircase, and kill the archer however you wish, then run back towards the beginning of the level, selecting your remaining 2 Crystal Soul Spears.
- Kill the two Giant Knights just outside the doors (they will be facing away from you), and trigger Homeward to return to the bonfire.
With an Int of 50, this run takes about 1:33-1:45 and will yield 16,682 souls with the Covetous Silver Serpent Ring.
Note: Although a Soul Spear will kill the Giant Knights in 1 hit, using the Crystal Soul Spear resulted in the knights giving more souls.
Speed Run Walkthrough
A fast walkthrough of how to get to the end of the level the fastest, picking up only essential items goes here.Notes & Trivia:
- ??
 Anonymous
The most beautiful location among all that I've seen in games. The orange lighting from the sun makes this location incomparable, no matter how labyrinthine it may be. Divine.
I don't think noting the utility value of a spell only available later in here at the start of the page is very helpful.
- Anonymous
Why does the darkmoon tomb bonfire not let me respawn at it when I die to Gwyndolin?
I don't want to have to run the entirety of the rafters. every. single. ****ing. time that I want to try gwyndolin's spammy bullshit
you'd think the capital city dedicated to the god of gods would have some proper ****ing elevators
- Anonymous
I get that we kind of get to explore the surrounding area of the main cathedral building in DS3 with the Irithyll of the Boreal Valley, but it's pretty different. Would've been nice to at least explore some streets since there is not much beyond the cathedral and the church buildings.
- Anonymous
There is something wrong with article...
"Talking to Frampt makes it impossible to find Darkstalker Kaathe later in the game, and hence will not allow you to join the Darkwraiths during this playthrough or be able to get the alternate ending."
spoiler alert
You can still get the alternate ending even if you never talk to kaathe tho?
All you need to do is just walk out at end, whether you talked to kaathe or not does not matter
correct me if im wrong tho
- Anonymous
The second gargoyle, the one near the rotary switch after the scaffolding. You can run down the stairs before turning the switch and it'll aggro but won't come off the ledge to fight you so you can easily take it out with lightning spears or whatever ranged attack suits you
- Anonymous
- Anonymous
Ds3 players mad that this place is actually difficult lol. BUt Ds3 HaS bEsT bOssEs!!
- Anonymous
- Anonymous
Been through this area at least 5 times hoping that I would enjoy it more on subsequent playthroughs, but my god is it so boring and frustrating to get inside Anor Londo. Once you're inside, 1v1ing silverknights gets pretty stale.
- Anonymous
- Anonymous
- Anonymous
Gonna get raito’d but the first half is padded to all hell, just tedious bs, small beams, ranged and aggressive enemies with a shitty camera angle meant to kill you. It’s pretty tho
- Anonymous
FYI, Aural Decoy trivializes the archers. You just have to time the first casting so you won't get hit and then the right archer should jump off the edge.
- Anonymous
Why is it called Anor Londo, not Lordran? Is It because their...Lords ran?
- Anonymous
Two handing the shield just didn’t work for me against the archers. Been using the Black Iron Greatshield and according to the guide the deflection should have pushed him off but… nope. Found myself losing ground and backing up more and more until eventually the other archer was able to shoot at me again and got me in the back. Enormous pain in the ass.
- Anonymous
I'M OVERJOYED BEYOND BELIEF TO SEE THIS FUUCKING PLACE ALL RUINED AND DETERIORATING IN DARK SOULS 3 BY ALDRICH AND SULYVAHN!!
FUUCK THOSE SILVER KNIGHTS, ESPECIALLY THOSE ARCHERS, FUUCK THE BAT DEMONS, FUUCK THOSE SENTINELS
FUUCK THAT CHANDELIER SECTION
FUUCK ORNSTEIN
GWYNDOLIN DESERVED TO BE DEVOURED BY ALDRICH AS WELL AS SMOUGH
PRAISE ALDRICH OUR GOD AND SAVIOR
PRAISE OUR LORD SULYVAHN
PRAISE THE ABYSS
BWAHAHAHAHA!!
- Anonymous
DS3 Anor Londo is better in pretty much everything than DS1 Anor Londo. DS1 Londo's cutscene is pure delusion of grandeur, as it tries to give the player the impression it is a majestic city, only to be mostly empty rooms and halways full of nothing. DS3 Londo has a grim atmosphere from the start, and peaks with the fight against Aldrich, who is using the half eaten body of Dark Sun Gwyndolin against the player. Gameplay wise DS3 Londo is not annoying to go through (looking at you, DS1 archers), as oposed to the test of patience that is the DS1 iteration of this area. Ornstein and Smough fight is the only saving grace of DS1 Londo, as it is an amazing boss fight and a rare ocasion of a gank fight done right. Even if I personally prefer Aldrich's fight due to the atmosphere, Ornstein and Smough is probrably the most iconic fight in the franchise, it's a shame that they are placed at the end of such an annoying and disapointing area, they for sure deserved better.
This....This masterpiece of a majestic and legend city is so ****ing annoying I got to hate it more than Blighttown. It's so empty and maze-like. I just think that besides the landscape in the intro cutscene, this town is ugly. Cliche dream castles and churches and all that crap. I mean I understand that Anor Londo is supposed to look fabulous with all those gigantic and fantasy-looking buildings, but they all look the same for god's sake. The first part of Anor Londo (until the Silver Archers) is such a pain to walk through. And the oversized ******* skinny ass bat demons or what the hell they are called. I think I died to these ****ers more times than I died to the archers. And after you pass that, you will be rewarded with a giant spiral staircase that you will lose yourself onto....... and a ****ing Prowling Demon hiding in a room?! What the **** is this bullshit??? ON THE OTHER HAND, the boss fight? *Chef's kiss*. That's the only PRO this location has. In my humble opinion, of course.
- Anonymous
I left my wallet, in Anor Londo. I gotta get it I've got gots to get it.
- Anonymous
So, I first fell in love with Soulsborne a long time ago. This was my first game. I struggled SO much in Anor Londo. I died dozens and dozens...and dozens of times. Probably 200 or more. The Silver Knights would just wreck me every time. I would attempt parrying them, but don't think I got it once. The infamous archer run seemed truly impossible and it must have taken me well over an hour to get past. Since then, I've put somewhere over 1500+ hours into the series, platinum'd all but DS1 and Sekiro, working on no hit runs, etc. But I never returned to the first one until now. On this run, I blazed through. Parried and backstabed the Silver Knights with ease. I got through the archers on my first try without any issues at all. It felt really great to think back to the first time I was here and struggled so much. It's just a video game I know, but it's really cool to see and feel the result of many, many hours of practice. What was once mind numbingly difficult, is now second nature. I just think it's a great example of how this series can translate to real life and the actually important things in it. Don't give up. Even if it seems impossible, keep pushing and you will make it.
- Anonymous
- Anonymous
To those who struggled at "Test Of Your Patience": Stay close to the wall with near the right knight and with shield on because the knight could still be shooting few more times and if you're greedy, you're dead. Staying close to the wall make his arrow stuck on the wall and thus miss, forcing him to go melee against you. When he goes melee, run all the way back to where the 2 demons were (and hopefully you killed them) and try to bait him there. The knight might try to attack and somehow drop down and dies. Repeat on the 2nd one. Ez but RNG-based method.
- Anonymous
Dark souls 3 was my first souls game so coming here in dark souls 1 was the most bizzare **** ever.
- Anonymous
did you know that the cathedral of anor londo is closely based on milan cathedral/dome?
- Anonymous
it’s not that hard to make a walkthrough. but who ever writes these has to have retardation. just write A B C not f(u)cking A N now go back to Z that i explain now but there is now a shortcut in Z. start each one from the nearest bone fire instead of each branch leading into the next.
- Anonymous
is it possible to get back to firelink without getting the lordvessel first? i messed up and wanted to go to the painted world but i forgot about the doll
- Anonymous
- Anonymous
where did the name "Anor Londo" come from? It reminds me the name Minas Anor (which, i believe, means the sunset tower or the tower of the setting sun in elvish) from lotr, since Minas means Tower Anor might mean "Sunset/setting sun" and since "With its perpetually setting sun and gorgeous architecture" is a thing, could Anor Londo be an elvish name?
- Anonymous
- Anonymous
Follow the stairs down until you come across a Sentinel, don't worry them as they are passive unless provoked so keep your distance, and head into the door on the left. Through the door you'll see two more Sentinels THAT MOST CEDRTAINLY ARE NOT PASSIVE to your left with a chest behind the one on the right. Head right, through the door into the giant courtyard.
not so fun thing that happened to me on ng+: so i was in the first bonfire's room and i wanted to check if the sanctus' regeneration was enough to counter power within's hp drain but i accidentally switched the spell with fire tempest before casting it. i watched in horror as like 6 pillars of izalith's fire hit the fire keeper. she fell to the ground with half hp, got up and with all the calm in this world she proceeded to take out her rapier and beat my sorry ass to a pulp while i was too shocked to run. it was a long trek to oswald of carim.
- Anonymous
- Anonymous
- Anonymous
- Anonymous
- Anonymous
If you are low level and don't have great weapons those silver knight archers are brutal. What worked for me was to run past the demons and wait on the ledge out of sight of the archers until they stop firing arrows. Then run up the slope and time your rolling so that the arrows miss. When the knight switches to sword keep your shield up until he falls off from hitting you. Popping a green blossom before making the run up doesn't hurt either.
- Anonymous
Holy CRAP!!! I did not know that the silver knights (sword/bow ones confirmed only) can backstab!!! I invaded and it was the host and a SunBro up there where there is an archer and the tower that leads down to Onion head. They aggroed both silver knights and as the host was attempting to go around for a backstab the silver knight backstabbed the host. The SunBro was just standing there watching the host fade away and the second knight killed him with a backstab also!
All my hours playing this game, I have never been backstabbed by them. I wonder if it's an extra mechanic that gets activated when summons or invaders are present, just like at Sen's Fortress there are only two boulders when there is a summoned or an invader. Regardless, I laughed until tears after that happened. Karma is a bisch haha!
- Anonymous
Word of advice, don’t try the great shield or poison arrow strategy suggested to kill the greatbow archers, they knock you back all the same with a great shield and they appear to be immune to arrows, that or the distance needed for the arrows to even affect them is within melee range.
- Anonymous
- Anonymous
If a silver knight invader has invaded you at sen's fortress or anor londo, I say hi.
(ps. attacking right away if you have summons.)
- Anonymous
For those confused on how to get past silver knight archers it's actually really simple. NEVER block the arrows, this will only knock you off or get an arrow in the back, but DO carry a shield. You don't have to wear light equipement, but never wear heavy equipment, like stone armor (arrows do the same regardless, plus you'll be too slow.) Medium or light works.
Run up the first flying buttress after spear demons, then wait for them to de-agro. Run up the second buttress, and go right till you make the silver knight use his sword. The other silver knight cannot shoot you from here, just don't back up too much.
Now you have two options, depending on preference. You can either block for a while up in his face till he falls off the ledge, or parry him until he dies (about 2-3 parry's). Fighting normally will only risk you falling off. Medium shields would work best.
Hope that helps some newbs out, i've been doing this method since my very first characters, and that was like 4 years ago. Good luck.
- Anonymous
At the start of the article, I would reword where you say "flying buttress that you can walk on". Flying buttress to me implies the thing is moving around between where you need to go and where you are. It took me a long time to figure out what the hell you're talking about
The buttress isn't flying at all. It just so happens to connect between the chapel you're supposed to enter and the balcony where you are at the time
At the very least, highlight the "flying buttress" in a picture
- Anonymous
Comfy weenie silver knight archer solution:
Get close enough for the boi to take out his sword
Immediately run away down the buttress
Silver knight chases you, falling right off the ledge because he is a doofus that doesn't look where he's running :^)
- Anonymous
If I invade a hosts world and they make it past the knights on the ledge and are blocked from proceeding further by a fog wall because of me I just bow from the ledge above and warp out because they've already been through enough haha. But... if the sons of biches throws poop at me it 's out of the frying pan and into the fire because two well placed chaos fireballs coats the whole platform in lava and they then know what it's like to be inside a microwaved hot pocket. Hehehe
- Anonymous
The easiest way I've found to get past the silver knights on the narrow ledge is this:
1. Good shield (I used the Balder shield)
2. Stone Armor set (free chest item in Darkroot just past Alvina)
3. Pyromancy Flame +10
4. Great Combustion
5. Fog Ring (optional)
Just sprint past all the enemies, heal if needed at the tower half way up to the knights and equip the armor and have pyromancy ready. Run up to the knight on the right and roll whenever he fires an arrow because blocking will most likely push you off. Once you get to the corner the arrows shouldn't be able to hit you and the knight will switch to sword mode. Block attacks and wait for an opening and use great combustion twice and he's toast. Roll past second knights arrows and once your close enough he'll switch to sword and after two more Great Combustions he's cooked as well and you can claim the souls.
This works reliably but there is always random elements that can still get you, this is Dark Souls after all lol.
- Anonymous
Don't appreciate this guide saying the Sentinels don't attack unless provoked. By "provoked", you mean simply being near them... you should have probably also added after mentioning the nearby chest that you shouldn't go for it unless you want to get attacked. And now I'm all the way back at the blacksmith bonfire...
- Anonymous
I think I figured something out that’s not mentioned on any wiki. If you kill gwyndolin and then turn Anor Londo dark you can be invaded there with both bosses gone BUT if you turn Anor Londo dark before killing gwyndolin and then proceed to defeat him you can no longer be invaded in the area even though it’s dark. So in summary: kill gwyndolin before turning Anor Londo dark if you still want to be invaded there OR turn Anor Londo dark then kill gwyndolin if you don’t want to be invaded there. Any confirmation or knowledge of this from others would be appreciated.
- Anonymous
I really wish we could enter Anor Londo by a huge elevator behind the sealed wall after the Iron Golem. The demons that bring us there are hostile enemies up there so it bothers me knowing that we reach the place by being carried by creatures that hate us. Sure, the entrance was sealed because of the undead outbreak but no army of hollows would get past the golem anyway that’s his purpose, to block the gateway. I think the in game way of reaching Anor Londo is lame
- Anonymous
- Anonymous
Attention invaders. If you’re bored of invading in the castle grounds you can head out to the balcony that you first came in from and invading there targets the outside zone without actually heading all the way out yourself, for a bit of variety.
- Anonymous
Problem: Greatbow Silver Knights
Solution: Run towards them, the right one first, knock him off the ledge either by blocking with greatshield, or practice your parry.
- Anonymous
Any recommendation for weapons for Anor Londo? Decided to retreat from there to have access to Andre for any basic upgrading to +10. I currently have +10 claymore, +5 fire long sword, +5 Astora's Straight Sword, and hopefully a +5/10 silver straight sword before i go back there.
- Anonymous
- Anonymous
After playing DS3 and Bloodborne for nearly a year straight I just had to take advantage of Lordrans design by leaving Anor Londo and the Lordvessel until I had everything possible before it cleared. I journeyed through New Londo until the seal (not worth killing Ingward), the Catacombs and Tomb of the Giants all the way to the golden fog gate and the same thing with Demon Ruins. I also went down the hollow to Ash Lake and came all the way back out on foot. Even though the back tracking doesn’t always feel perfect I still couldn’t get enough of it, it gave the game a true sense of adventure that the others can’t offer. That was outright the most immersed I’ve been in any of the series since I began years ago. Masterpiece!
- Anonymous
Central Park in New York was designed by Ormstead and Vaux True fact
- Anonymous
- Anonymous
If you're playing as a pyromancer I found the Iron Flesh spell to be really useful against the archers. Once you get up to the ledge and the archer starts to switch to sword and shield you have just enough time to do the spell before he gets to you. You can then soak up the hits and knock him right off.
- Anonymous
why in my second bornfire didn't have Solaire Knight :<<< i've have a terrible nightmare with ornstien :( pls help :(((
- Anonymous
The way I do it, I either use my Black Knight Sword, or Quelaag's Furysword. With the Black Knight Sword, you can hit the spear wielders after they shield bash and still get your shield back up for the possible spear swing. This technique does NOT work with the sword wielders tho, as their attacks are too quick. With Quelaag's Furysword, however, you can hit even the sword wielders after a shield bash and still get your shield up in time to defend against the following sword strike. With a Black Knight Sword of +4 or higher, it usually takes 3 hits with 1 hand and shield at 20 strength. With Quelaag's furysword at +5, which I always upgrade it to right after getting it, it takes the same 3 hits and can be done faster. However, there is a small drawback to Quelaag's Furysword. Its attack power partially depends on the amount of humanity you have. if you died and have no humanity, you'll notice a drop to your damage. The only enemies I usually circle around while fighting are the giants, since their shields block all damage in close combat. And be warned, the ones in the hall before the boss use heal and emit force miracles.
- Anonymous
Bro who recommended a lighting claymore +5 for farming Silver Knights? Smh
- Anonymous
Is it possible to go back to firelinkshrine without having a lord vessel?
- Anonymous
- Anonymous
after killing Gwynewere and having dark Anor Londo, you can backtrack from Duke's Archieves to Anor Londo and the sun has returned and it is not dark anymoer
- Anonymous
- Anonymous
Beat O and S first try, defeating O first for the easier fight. with the BK halberd +3, Boar helmet+1, eastern chestplate, knight leggings, and gauntlets. lvl 54.
- Anonymous
- Anonymous
- Anonymous
Maybe a tidbit to be added to the “trivia” section. Anor is actually Tolkien Sindarin for Sun. Can’t find anything on Londo, but we do know Miyazaki drew from a lot of different places for inspiration, and most modern medieval worlds draw from LoRd of the Rings. Maybe this is his nod to that.
- Anonymous
- Anonymous
Please note that the greatshield deflection strategy for the silver knight archers may not work anymore in Remastered. I just tried it and the Silver Knight's sword strikes did not knock him back at all.
- Anonymous
I'm on ng+ and I need help in anor londo. I'm playing the remastered edition on Xbox one. Can someone please help or place a summon sign. Thanks.
- Anonymous
The silver knight snipers wouldn't be so bad if they didn't respawn after death.
- Anonymous
In the Remastered version Gwynevere was still presented after defeating Gwyndolin.
- Anonymous
Wait, so let me be clear, right before you choose to place the lordvessel is when the ending is selected? Like, if I got with kaathe I can't get the Frampt ending, and if i go with frampt I can't go with Kaathe?
- Anonymous
- Anonymous
- Anonymous
- Anonymous
Maybe this is because i had already beat ds2 and ds3 (i got ds1 remastered) But the build-up the wiki and literally everyone else says abt orstien and smough being hard was a total lie. I only took damage once and it was from smough's 2nd phase super slam aoe, and only the aoe actually hit me too! And im not saying this for bragging rights im just saying that if its your first time fighting them dont be super afraid. Also solaire does help when it comes to being a distraction in the 1st phase.
- Anonymous
Coming back from DS3, I realized Anor Londo and the Ringed City have even more surprising similarities than I thought. Namely, if you look toward the top of the cathedral from the rooftop courtyard where you encounter one silver swordsman and one silver archer, you can see a staircase leading to a tower that looks unfathomably like those leading to Filianore's chamber.
Second, I never realized that the Halflight boss fight in the Ringed City is a parallel to Ornstein and Smough, though in this case, "Judicator Argo" (instead of "Executioner Smough") calls forth the "Spears of the Church" (as opposed to Dragonslayer Ornstein, another lightning spear user). The arena is quite similar to Ornstein and Smough's, though somewhat smaller and lacking the statues of the gods, and although Argo vanishes/dies partway into the battle, he can be aggroed before concluding his speech.
Lastly, in Anor Londo, we may encounter Gwyndolin, master of the Darkmoon Blades, who sealed himself within the Tomb of the Great Lord Gwyn; in the Ringed City, we meet Shira, "Daughter of the Duke," locked in her "Dark Room" with the remains of the mad Pygmy King. Similarly to how killing Gwyndolin or destroying the illusion of Gwynevere subjects the player to invasions from spirits of vengeance, awakening Filianore and unmasking the Ringed City prompts Shira to "invade" (she does not appear as a dark spirit, but rather spawns in person) the player in search of justice for revealing the secrets of the gods.
It's weird how DS2 would recycle stuff from DS1 and it was just stupid and lazy, but DS3 will recycle concepts and somehow make them feel completely new, even if it was just a slight tweak or nod to the lore...
- Anonymous
►►►Pro tip for archer silver knights: buy the reinforced club from the undead merchant in the beginning of the game. If you two-hand it (only need 8 str) each hit will stun and interrupt their attacks, making it super easy to stunlock them. Each hit also pushes them backwards >:D
- Anonymous
- Anonymous
- Anonymous
- Anonymous
WTF!!!!!!!!!!!!!!!!!!!!!!! No where here does it say that when you walk into Gwen... whoever's room, it will cause the chick at the bonfire to attack...FOREVER!!! Now I have to kill her and this bonfire is useless for the rest of this run. I didn't even hit her once( she destroyed me before I could get to her) and the covenant I just joined is ruined. Thank you, now I have to find a different site that has more accurate info.
- Anonymous
poison arrows are the best way to deal with the archers, thanks for the help
- Anonymous
The archers DO NOT auto fall off from walking up them with a shield and blocking. Thanks for wasting my time.
- Anonymous
In section: Crossroads - What to do with the Lordvessel?
Corrected spelling for Blacksmith Andre (was Andrei), and links were pointing to non-existent "Blacksmith Andrei" page.
- Anonymous

for those who don't already know, you can cheese the royal sentinels by standing on the stairs and using the dragonslayer greatbow. it only takes about 5 or 6 hits
0
+10
-1