Painted World of Ariamis is a location in Dark Souls and Dark Souls Remastered. Accessed via Anor Londo and only if the player has obtained the Peculiar Doll item, this optional area contains challenging enemies and can render players "trapped" for a time. Make sure you prepare adequately before proceeding.

General Information
- Previous: Anor Londo
- Next: The Great Hollow / Sen's Fortress
- Recommended Levels: Any
- Bosses: Crossbreed Priscilla
Video Walkthrough
Painted World of Ariamis Map
(Work in progress)
NPCs in the area
- Crossbreed Priscilla (She's the area's boss, but you have a choice to not fight her if you wish)
Bosses
- King Jeremiah (NPC Phantom)
- Undead Dragon
- Crossbreed Priscilla
Items
Consumables
- Pyromancy scroll: Fire Surge (dropped by Hollow mutant in a tower accessed by the sewers.)
- Pyromancy scroll: Acid Surge (found close the open area with the cages and pikes, with hollows walking around.)
- Miracle scroll: Vow of Silence (found on top of a tower accessible after obtaining the Annex Key.)
- Humanity
- Twin Humanities
- Large Soul of a Lost Undead
- Large Soul of a Nameless Soldier
- Large Soul of a Proud Knight
- Large Soul of a Lost Undead
- Purple Moss Clump
- Blooming Purple Moss Clump
- Soul of a Nameless Soldier
- Egg Vermifuge
- Divine Blessing
- Repair Powder
- Transient Curse
Weapons, Spells & Armor
- Black Set
- Velka's Rapier
- Painting Guardian Set
- Bloodshield
- Red Sign Soapstone
- Egg Vermifuge
- Souvenir of Reprisal
- Ring of Sacrifice
- Dried Finger
- Gold Coin
- Broken Straight Sword
- Short Bow
- Spear
- Large Leather Shield
- Bonewheel Shield
- Dung Pie
- Prism Stone
- Copper Coin
- Gold Coin
- Silver Coin
Upgrade Materials
- Dark Ember
- Red Titanite Chunk
- Titanite Chunk
- Twinkling Titanite
- White Titanite Chunk
- Green Titanite Shard
- Large Titanite Shard
- Demon Titanite
- Dragon Scale
- Blue Titanite Chunk
Keys & Other
- --
Enemies
- Hollows (Sword wielding, Torch wielding & Archer)
- Torch Hollows
- Engorged Zombie (Pyromancer, Torch wielding)
- Snow Rat
- Crow Demon (Harpies)
- Wheel Skeleton (Bonewheels)
- Phalanx
- Tower Knight (Greatsword, Greataxe and Shield) - 100% Large Titanite Shard Drop
- Vagrants
Full Painted World of Ariamis Walkthrough
Before you enter the Painted World
Where - This area is accessed via the giant painting on the bottom floor of the chapel in Anor Londo; the area below where you crossed the ceiling rafters.
How - You need to have the Peculiar Doll to enter the painting - you obtain this by going back to the room you started in on your return to the Undead Asylum.
Important Notes:
- Once you have entered the Painted World, you cannot get back without crossing the map to find the "exit".
- Fighting the boss, Crossbreed Priscilla, is optional; you can talk to her, and she'll ask you to leave her world in peace. If you hit her, the fight begins. If you don't want to fight her, just approach the edge of the path behind her and a cutscene will start, returning you to the painting in Anor Londo.
- You can return here to fight her later if you want.
- This is a tough area with many enemies that, although are easy to kill, can also dish out a lot of damage very quickly.
It can be speculated that the developers had to think fairly carefully in regards to the design of the Painted World. As the player will be trapped here, a few badly balanced sections stopping player progression would render it a game-breaker - hence, for example, the unique option to bypass the boss.
The enemies here are weak enough to be taken on by any player class, but tough enough to be a genuine challenge for the careless. However a good bow and plenty of arrows is always recommended as there's plenty of options for sniping.
From a design point of view, a level set in a painting was clearly a good excuse for the inclusion of enemies (the Phalanxes from Demon's Souls and the harpies) and snowscape environment that couldn't otherwise be squeezed into Lordran.
To access the giant painting in the cathedral ground floor in Anor Londo , you'll need the Peculiar Doll. With that, you will be able to enter the very large painting in Anor Londo. The Doll is in the cell where the game started, in Northern Undead Asylum, and can be acquired without fighting Stray Demon, by simply not falling into his hole.
Welcome to Ariamis
You'll enter the area on a wooden bridge, and proceeding through the only path available will lead to the only bonfire in the area. Once here, head up the stairs to meet three Hollows; one straight ahead in front of a locked wooden door, and two around the the right side of the building. At the bottom of these stairs on the right, you'll notice a corpse hanging from a rope with an item on it - shoot the rope with an arrow or a throwing knife, to drop the corpse beside you, and collect the Humanity it holds.
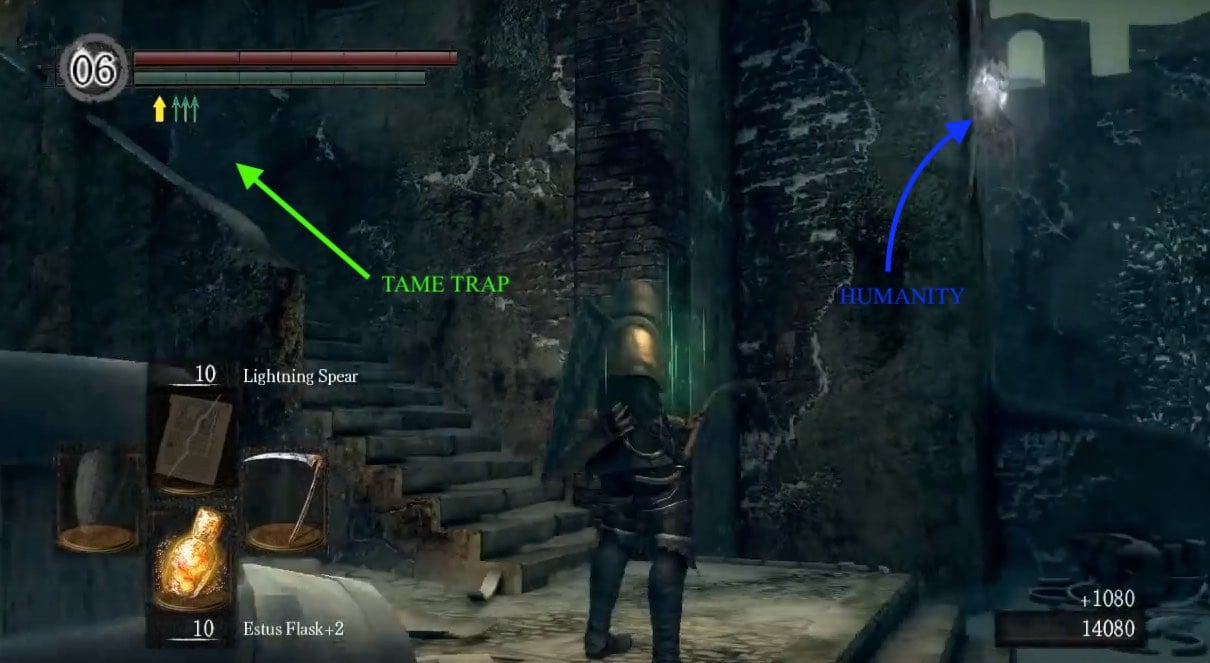
Head up the stairs to find a Hollow Archer up the next stairs, as part of a very tame trap; including the bait archer, there are two archers (the other up the next flight of stairs in front of you) and 2 Hollows with swords. This makes a a fairly easy fight, assuming you're weapons are up to level with your campaign progress up to this point.
Now you can continue past the second archer on the right, but we like to go the extra mile so head up the stairs on the left to find two more Hollows with broken swords on the second staircase, and another at the very top. Up here you can loot a Soul of a Proud Knight, but beware: two Harpies will fly over and attack (their attack is triggered by walking over to the corpse that hold the soul, so they can be avoided by not going near it). These enemies may look frightening but aren't so, having only two attacks - one is a jump/grab, while the other is a normal one-two attack with their wings. Simply lure one down the stairs and deal with it, then repeat. Again at the top of the building, you can drop down on a balcony to pick up a Twin Humanities. Inside the building is a lone Hollow, proceed down the stairs to find 2 Snow Rats and a Soul of a Brave Warrior. Head back up the stairs where you will find a door and your next challenge.
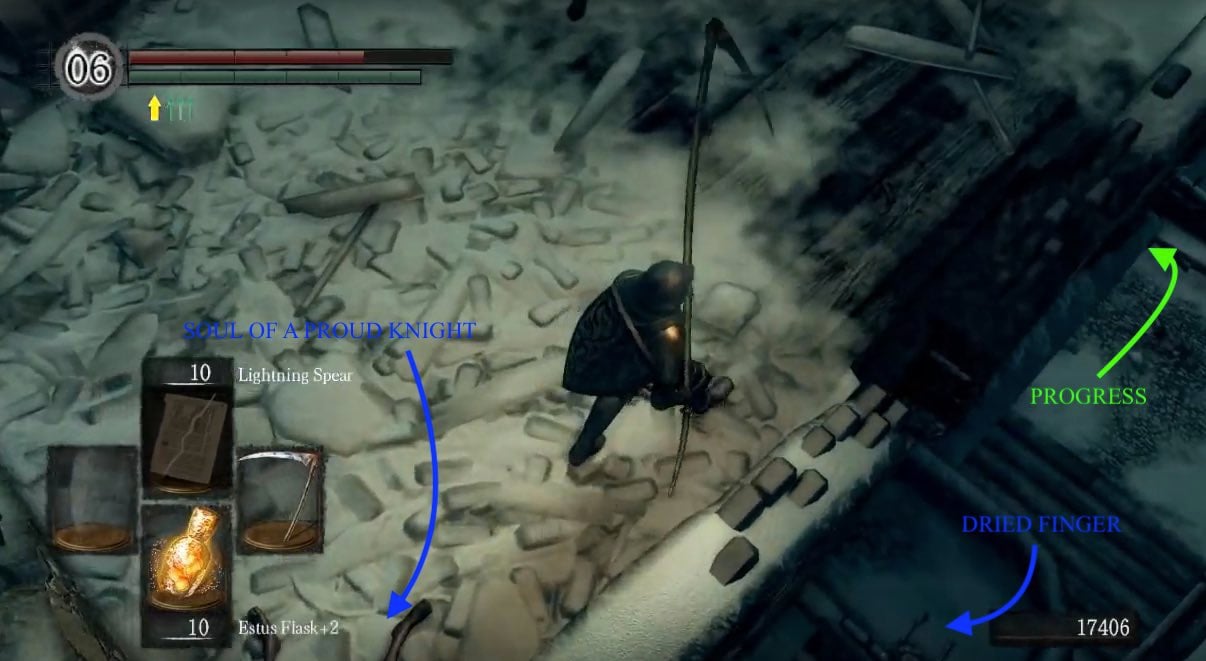
The Engorged
This will be your first encounters with the Engorged Hollow. These are hollow enemies with tumorous toxic growths in places on their heads, making them puff up like marshmallows. There are two varieties - an Engorged Pyromancer (stands still and casts a long range fire spell) and an Engorged Torch Wielder (chases after you brandishing a torch) - and most encounters come in twos with both varieties being represented. Here are a few notes and tips you'll want to understand before facing them:
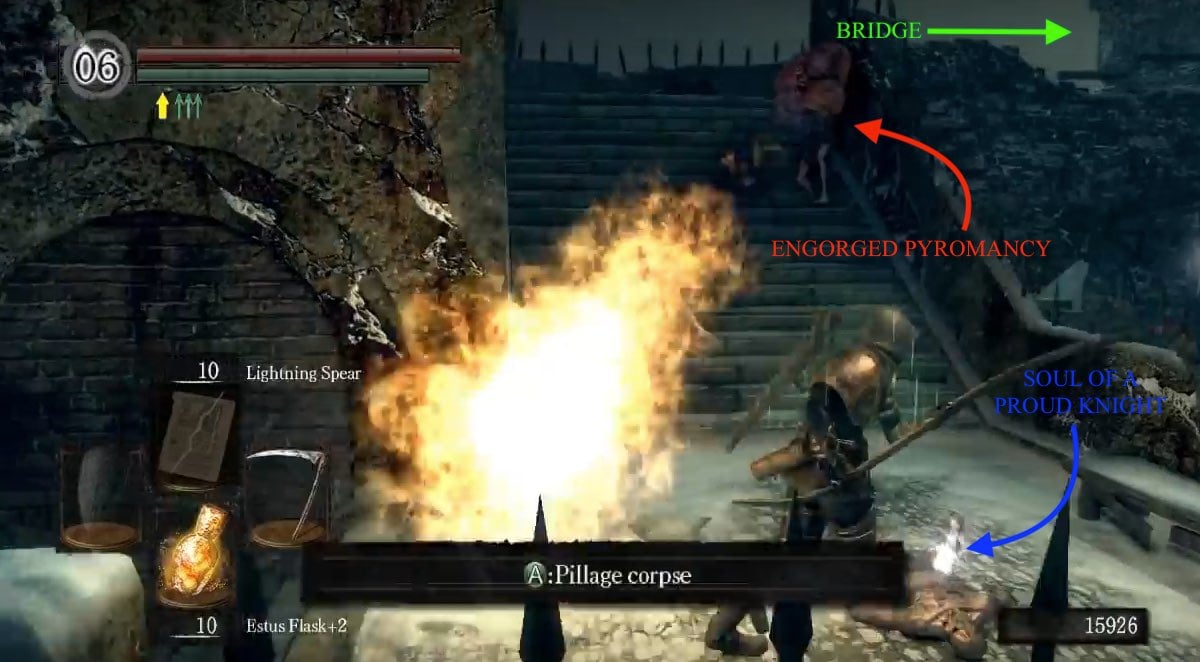
- A good tactic for dealing with them is to lure the melee away from the caster to divide and conquer them.
- Both Engorged varieties will spew out toxins as an attack and as they die, so avoid getting too close and don't finish them off with melee attacks as this will likely toxify you.
- The "Gold-Hemmed" set combined with the spider shield should allow you to melee one Engorged at a time without becoming toxic from the spew attack.
- It's also worth noting that by using the Black Knight Sword's R2 attack, it will knock them back far enough so that the spray wont hit you. Swords with similar effects may work as well.
- If you strike a final blow and immediately roll away, the toxic spew attack can be evaded or using a Spear or the Estoc, you can kill them by poking from behind your shield and block most of the toxin buildup with your shield.
- Easiest way to deal with them would be to use a back-stab on the final blow. The kick at the end of the animation will kick them far enough away for the toxins to not reach you.
- Pyromancies or Flame Based Weapons are able to stop them from emitting toxin, so you must want to go there with one of these.
- That being said, getting a back-stab or a parry with a flame weapon will not constitute as death by fire; they will still spew out toxins so watch your step!
At the top of the stairs, where the Engorged were, proceed onto the bridge extending to the right. Across the bridge, you may notice a Hollow Archer on a collapsed structure, but be very careful about how you engage him. You'll have to enter the building at the end of the bridge, then exit out a door on the right to access his area and doing so will aggro the Engorged Pyromancer and the 2 Engorged Torch Wielder in there, as well as another 2 Hollows that climb over the wall to ambush you as you approach the archer.
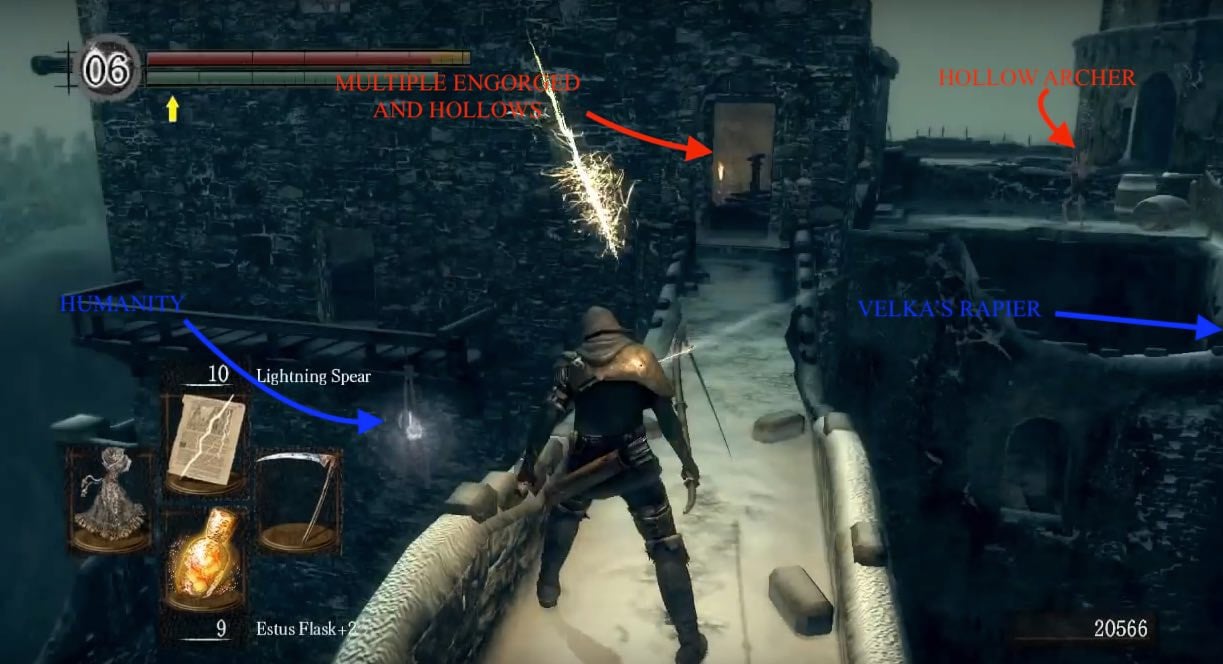
The easiest way to do this section is to kill the Archer at a distance using arrows, run into the building to kill the Engorged, then go outside to trigger the ambush. Standing at the entrance to the building from the bridge, go out the door to the left and cut down the hanging corpse to retrieve the item it holds later. From here, continue up the stairs inside the house to the farthest room and jump across the gap to obtain a Soul of a Brave Warrior from the corpse hanging in the window.
Head down the ladder and prepare for the impending ambush of a single Hollow. Dispatch him, and continue to the bottom, where you'll find a room with 2 Snow Rats and a chest containing the Painting Guardian Set. Now back-track, climb the ladder, and take an immediate left when you get to the top. Pass through the two doorways (minus the doors), and you'll notice a corpse hanging off the wood plank after passing through the second doorway; pillage the body for an Egg Vermifuge. Drop down and head out the doorway right beneath you and look to the right for the tower.
Note: By jumping from the ledge the archer was previously standing on towards the ledge below with an item on it (Velka's Rapier), one can obtain access to the Annex area without having to enter the sewers. Among other things, this allows one to obtain the Dark Ember and still utilize the Undead Dragon shortcut. The only significant item missed out on with this method is the pyromancy Fire Surge.
Climbing the Tower
To the right you'll see a large tower and to the left is a Large Soul of a Proud Knight, where you'll be ambushed by another Hollow. Now head towards the tower and start to climb the spiral stairs inside, but back up as soon as you attract the attention of a Harpie - lure it outside and kill it. You can repeat this process until you get all the Harpies, then climb all the way to the top of the tower where you'll find the Red Sign Soapstone waiting for you. On your way back down, you can drop off the stairs to a ledge for a Soul of a Brave Warrior. Go back down the stairs and back outside the way you came in, look to the left once you get outside and go down the staircase on the outside of the tower.
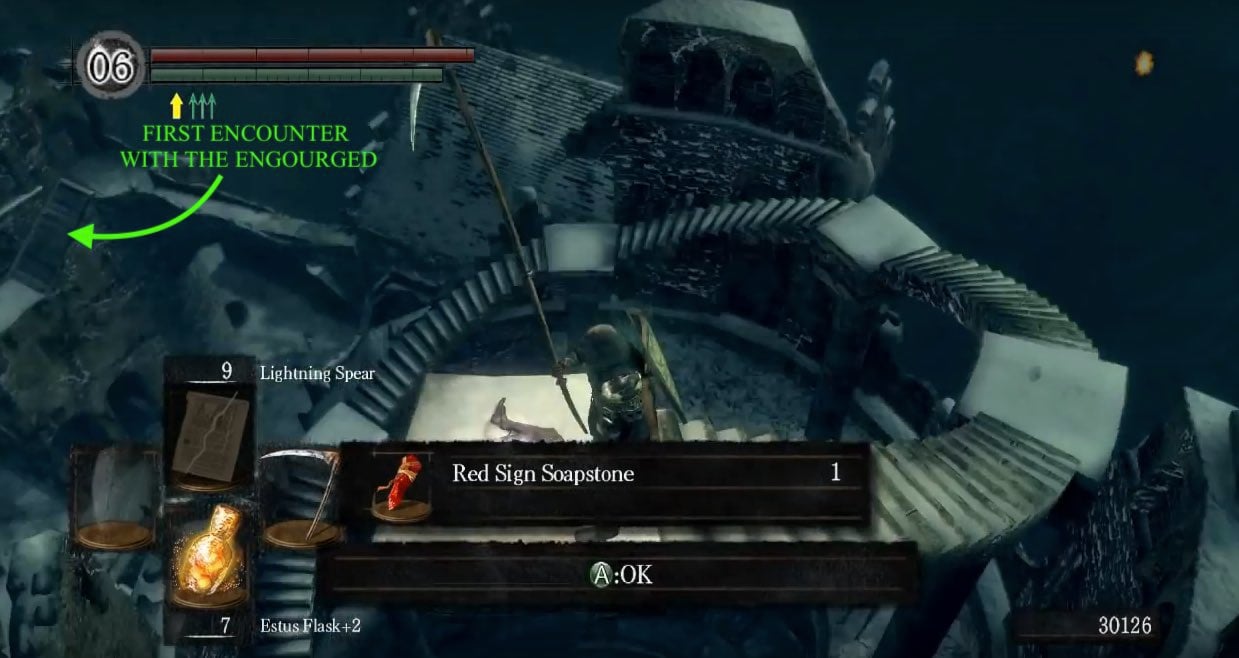
The Undead Dragon's Bridge
At the bottom of the stairs you'll find a broken bridge on your left with a few corpses with items on them, and at the end of it you'll see a large unidentifiable object. As you proceed across the bridge, the object at the end will reveal itself to be an Undead Dragon that will then start to chase you back across the bridge to the tower, but only until the end of the bridge and is then much like the Undead Dragon in the Valley of Drakes.
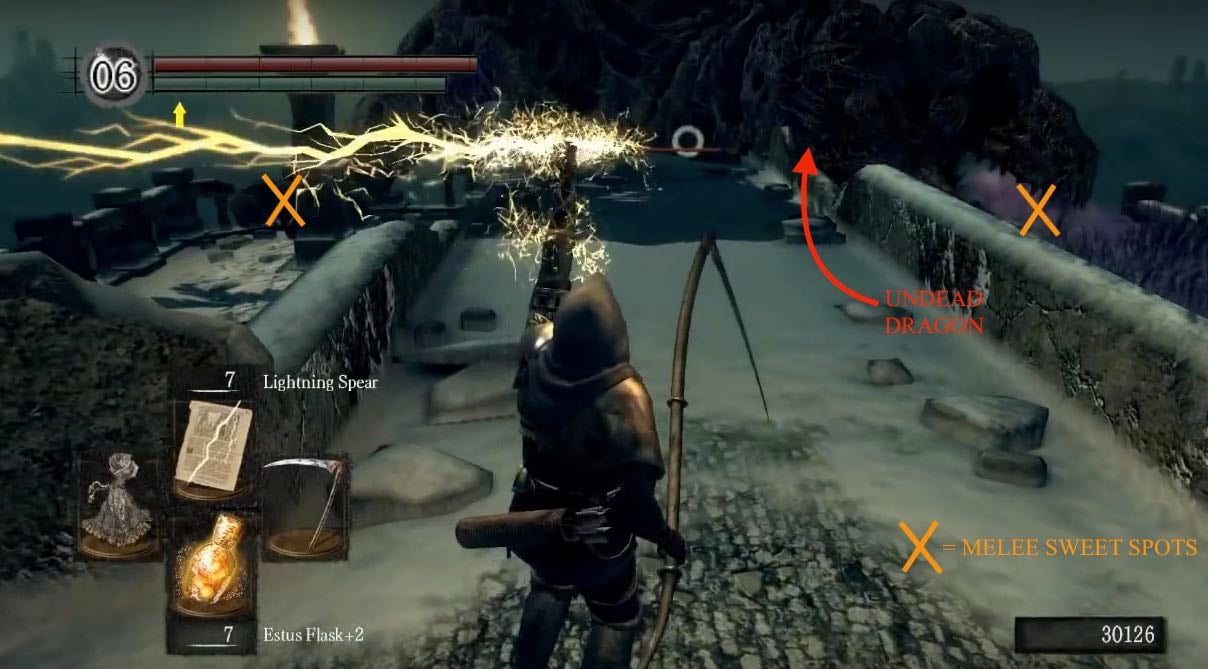
There are several safe spots in front of the bridge where you can deal with it at range without getting hit. One of the safe spots is in the corner against the railing on the opposite side of where you just came from.
If you're more comfortable with a melee approach, run up to the left in front of its right foot, by the small column and attack the foot with no lock-on. It will hit you with its Poison Breath, but if you have decent Vitality you should be able to withstand the blasts without losing too much health. If you stray too close to the foot for too long it will lift it to smash you. Roll backwards to avoid this and then get back into position. If you want to avoid the poison as much as possible, you can bait the first breath attack by standing next to one of his feet, then running to the other. Attack this foot a few times, then run back to the other one and his breath attack should be targeted at the foot you just left. Keep switching like this and watch out for the foot smash and he'll be down in no time.
Once it's dead you'll be able to loot the bodies on the bridge to acquire a Dragon Scale, a Bloodshield and a Large Soul of a Proud Knight.
- NOTE: This paragraph details a way to get to the end of the area now, skipping a load of it's challenges and pick-ups - so if you don't want to do this then go to the next paragraph.
- After you kill the top half of the Undead Dragon, go to the end of the bridge and perform a jumping attack on the obstruction at the end. When the attack hits, the obstruction will stand up and reveal itself to be the bottom half of the Undead Dragon we just killed . With the legs stood up, you can make your way through them and off the ledge at the end to drop down to the path leading to the boss' fog gate - skipping a sizable chunk of the area. However, if you decide to jump down from here beware of the Tower Knight that will attack you before you can recover from the fall [Knight was never there for me until after opening big doors]. Go through the fog gate to find the boss and the exit back to Anor Londo.
Assuming you didn't follow the above paragraph to skip to the end of the area, head back towards the tower and follow the path against the wall of the tower down into the resulting passage. Take the stairs to the bottom of the tower to find a locked metal door (you'll find a switch to open it later) and a fog gate.
The Courtyard
Go through the fog gate to enter a courtyard where you'll see the Phalanx surrounding a statue. These human-like blobs of flesh are slow-moving enemies that wield spears - possibly javelins - and shields, there are 13 of them total. Due to it's ability to throw their spear and absorb a substantial amount of incoming physical damage via the shield, it is easy to become overwhelmed by the drove of Phalanx. Here are a few tips and notes on them:
- The easiest way to kill them is with Poison Mist or Toxic Mist [elemental weaknesses need confirmation]. Pyromancy Spells work best.
- The next best option is to run in circles around the group until their backs are facing you. Once behind the Phalanx, strike quickly and back off; rinse and repeat until all 13 have perished. (once you have perfected your own technique to kill the drove of Phalanx, the courtyard can become an all right soul-farming location)
- When you get close to the statue they surround, a Harpie will drop down from the top of the tower - if you haven't killed all the Phalanxes when it drops down it would be best to take care of it first by luring it somewhere different.
After killing the enemies here, you can feel free to look around. You'll find a soul item in a little alcove by the tower, then follow the wall to a staircase up to another soul item. If you cut down the hanging corpse earlier on, you'll find a Humanity and close-by you'll find a well with ladder going down into it - this well can be ignored for now but will be important later. For now, it would be wise to go back and take a right at the statue to find the locked wooden door from earlier, which you can unlock from this side, opening a shortcut back to the bonfire start of the area.
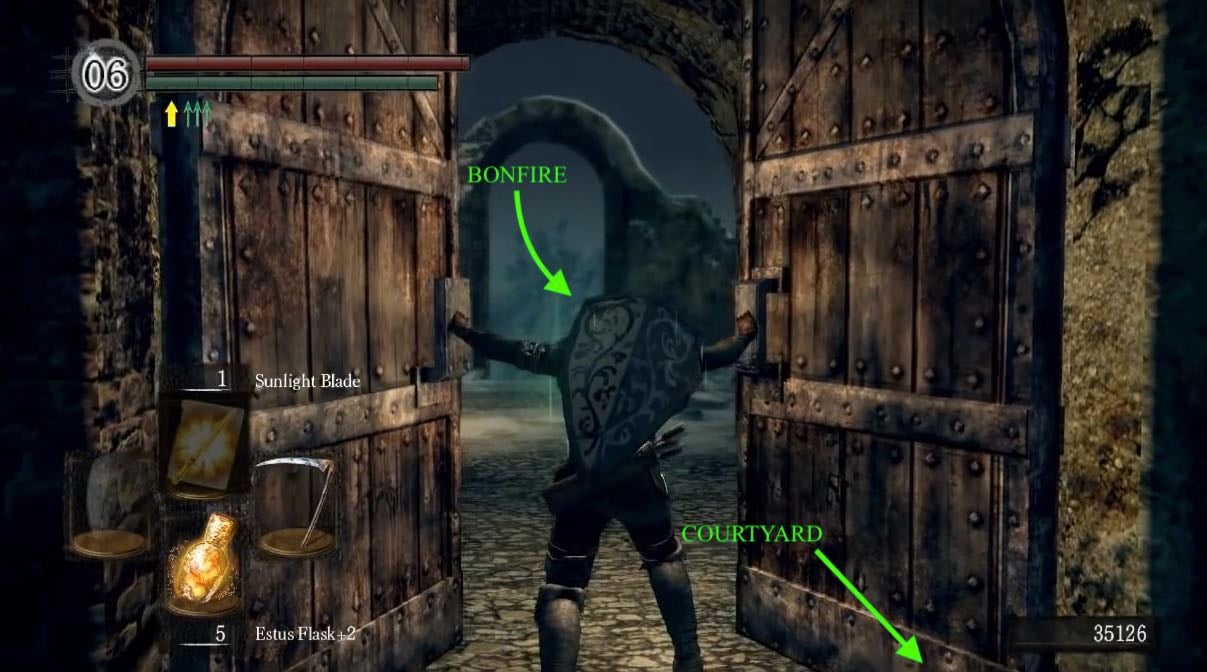
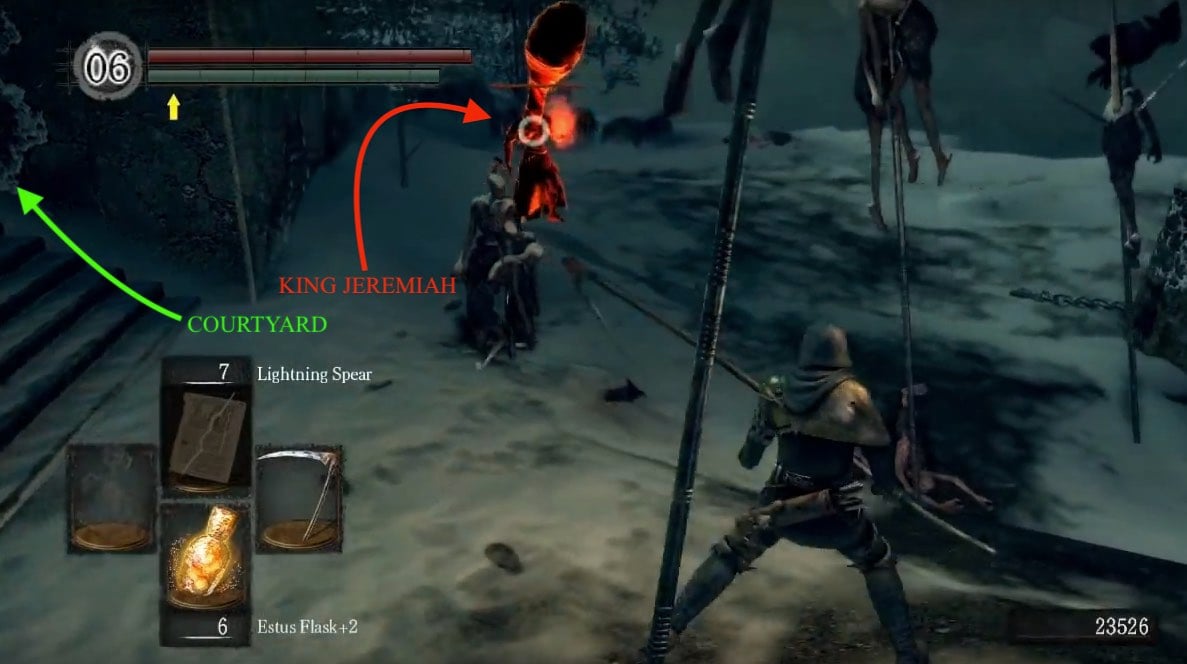
King Jeremiah's Area
Restore your Humanity, go back to the wooden door and take a right once you go through it to find an area where many people are impaled on spears. Be prepared to be invaded by Xanthous King Jeremiah down in this area now that you're in human form. There are also three Torch Hollows & two Hollows down here along with three Souls of Proud Knights (one on the left and two at the end).
Immediately upon entering, hug the wall to your right to find the Pyromancy: Acid Surge hidden beside some stairs, then take care of the Hollows and loot the Soul items. The invasion by King Jeremiah will occur when you try to leave the vicinity. Apart from wielding all the Chaos Pyromancies, and a Notched Whip, he should not prove too difficult. Once you've defeated him, not only will you acquire his weapon, but you will be able to get his armor (the Xanthous Set) before exiting back to Anor Londo - more on this once we reach the end of the area.
The Well
Now it's time to go down the well we found earlier, but be warned of the cramped and dark state of the area, it's something of a maze with a wealth of illusory walls and contains some tough enemies - bonewheels.
Advice for dealing with them: As you would with most enemies in this game, take them on one at a time. Lock on to them with your shield up, and wait for them to finish their roll before attacking. If you can't kill them in three or so hits while they're stopped, be prepared to block again, and hope you survive another roll attack. They also keep rolling until they hit something, so try luring them close to a wall and a well-timed sideways roll, can help you get clean hits on them.
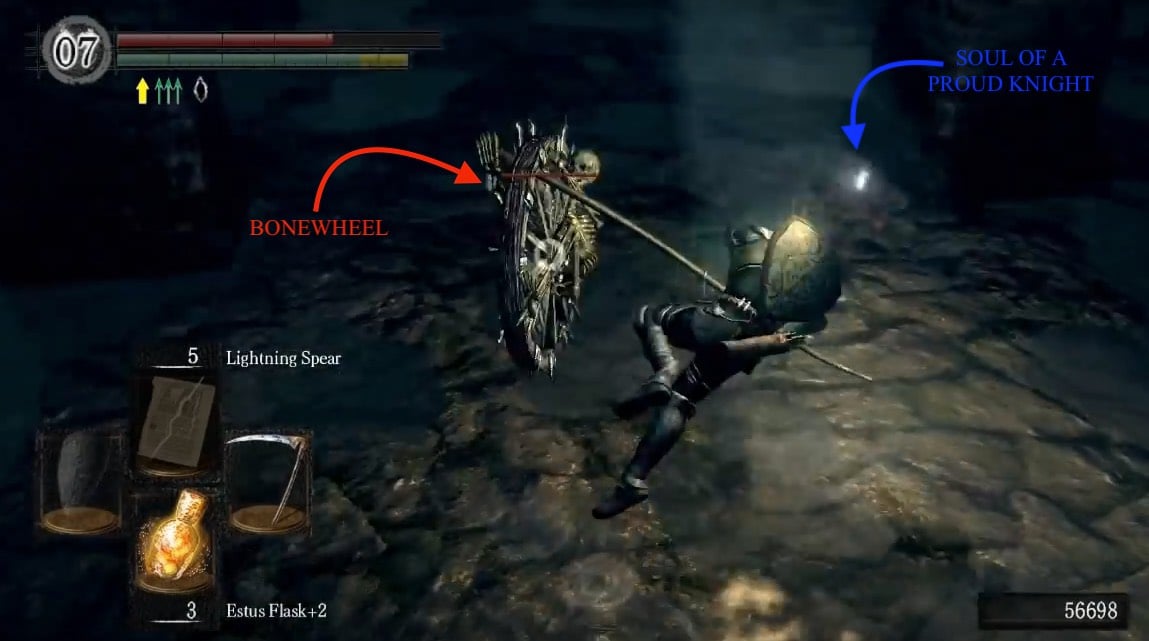
At the bottom of the ladder, immediately on your right, you will be assaulted by a Bonewheel. If you go straight now you'll find an illusory wall in front of you next to a Soul of a Brave Warrior on the floor. Head through it and find another one to your right, and a path to the left. Take the path left, keeping your shield up, and eliminate any Bonewheels you encounter.
Follow that path as far as you can, and you'll notice several more illusory walls. One of them will lead to a set of stairs going up to a lone Engorged Hollow facing away from you. Put it out of its misery and loot the Pyromancy: Fire Surge it holds. Make your way back down into the well again and head left, removing the illusory wall in the way - the one on the right we mentioned earlier. Take care of the Bonewheel and you'll find the Annex Key. Now go back towards where you fought the first Bonewheel and remove the last illusory wall which was, initially, to your right - beware that there are two Bonewheels in here ready to attack, so get your shield up immediately after removing the wall.
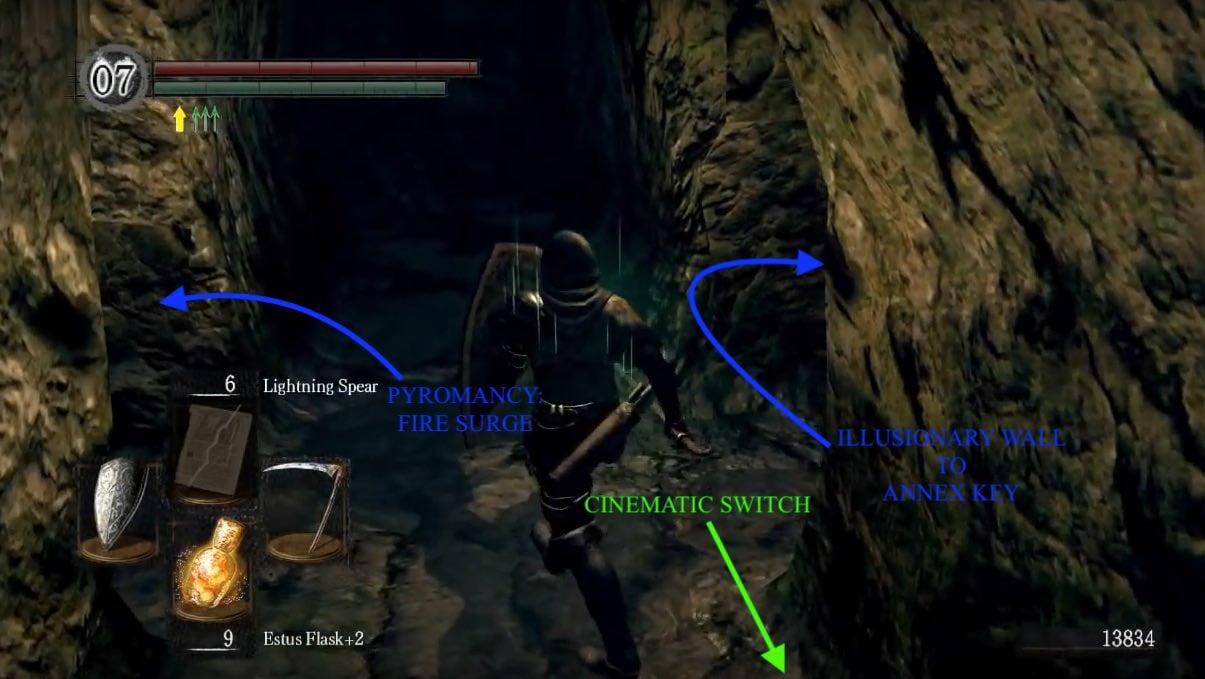
There are many more of them in the area behind the wall, around 5 or 6 in total, as well as a few Soul items. Down here on one of the pillars you'll also find the switch to trigger a cinematic to open the locked metal door on the bottom floor of the tower - it's on the pillar next to a corpse bathed in light. In the corner of this room you'll find a small passage with a ladder that will take you up and out of there (hopefully never to return).
Exploring the Annex
Head back out into the courtyard and enter the church, then through the locked door behind the alter - unlocked with the Annex Key. Make your way to the top and exit through the door. At the top you will reach a three way junction but we are going forward to take care of the lone Engorged, and the two Harpies, straight ahead. The challenge should prove to be easy; they often kill themselves trying to perch on your head - just be careful not to fall yourself. Continue forward then down the stairs on the left, taking care of the pair of Engorged, and any possible Harpies that may attack you down here. You will also find the Dark Ember.
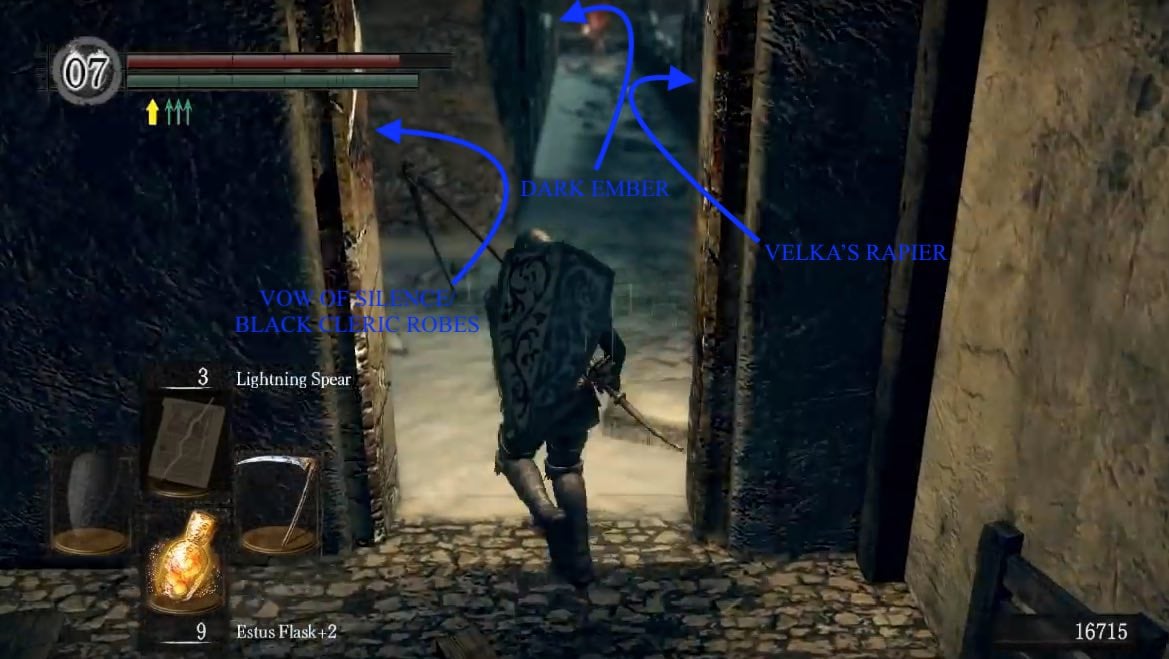
Head back and take the left on the junction, taking care of the Engorged Pyromancer as you continue up the stairs, and two more Harpies (unless you killed these two on the tower with the Dried Finger). Loot the corpse to receive the Miracle Vow of Silence then, take the other staircase around the tower to pick up the Black Cleric robes -a.k.a Velka's Set. (if you drop down off the edge where you found Velka's set and look left, you'll see another corpse with a large soul item)
Head back to the junction and unveil the third passage to the right by hacking at the wood blocking it. At the end there will be a corpse with Velka's Rapier, to complete your Velka set. Jump off here to enter the middle level of the house and drop down for 7 more rats. Make quick work of them, and once you get to the ladder and are facing it, make a 180 degree turn; you'll see several barrels and a glowing item behind them. Sprint and jump across the gap to break the barrels and reveal a corpse with an item -- a Gold Coin. Now, make your way back to the courtyard.
Leaving the Painted World
With all that done, you're finally free to leave the Painted World. To exit, head through the metal door, now open through the cinematic you triggered earlier, at the bottom of the tower to access the path that leads to the fog gate. Eventually you'll reach a large stone bridge where a Hollow Archer will be firing arrows at you up ahead with a Hollow, hiding out behind a wall on the right, to ambush you.
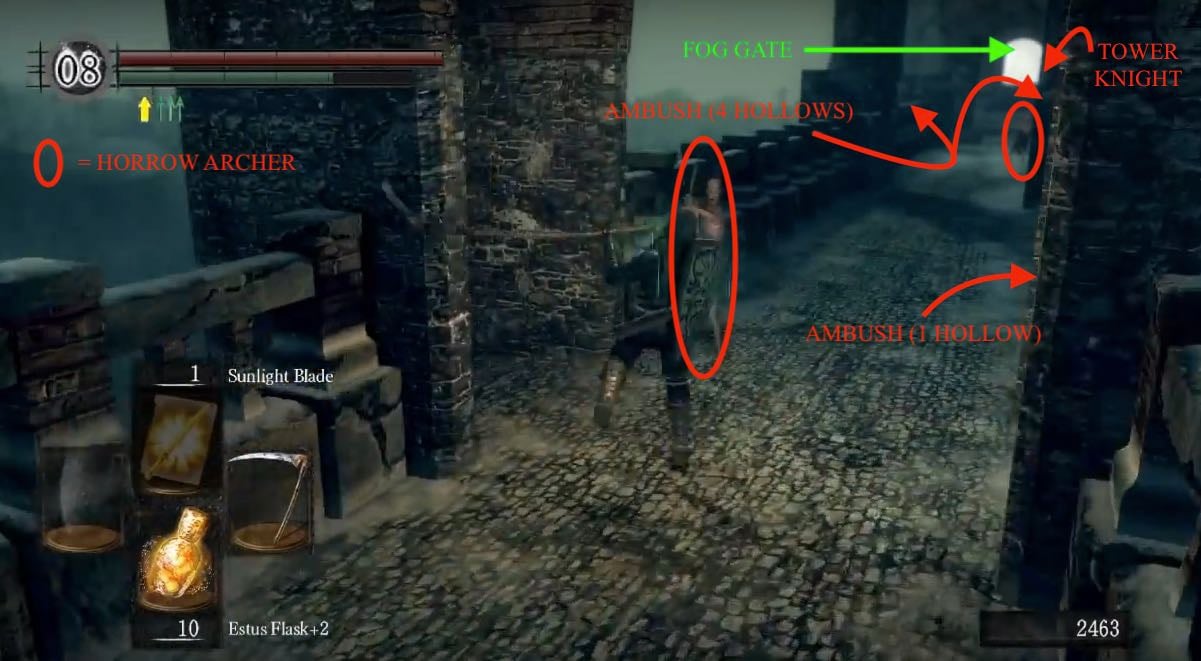
Once you defeat these two Hollows, prepare to face the same attack ahead, however this time against 4 Hollows hanging on the sides of the bridge, waiting to ambush you; there's also a Tower Knight further on, so avoid fighting the Hollows in that area. It isn't ideal taking them all on simultaneously, so get rid of the archer ASAP then lure, kill, and repeat. You need not worry about the Tower Knight, as long as you don't head in his direction when fighting the Hollows.
This sword variety of the Tower Knight (compared to the mace variety encountered so far) is stronger but uses the same move-set, so he shouldn't prove too surprising in a fight. He's weak to lightning and drops a Large Titanite Shard. Once everyone's dealt with you're just a fog gate away from Crossbreed Priscilla - remember, where you choose whether to spare her, or not.
If you choose to fight Priscilla, here are a few tips and notes:
- When you initially attack her, she turns invisible and remains so until you've dealt a certain amount of damage. However, she leaves footprints if she walks in the snow which helps you predict where she is, roughly.
- A good way to counter her invisibility is to use throwing knives. If you hit her with a knife, it sticks on her for a short period of time. Keep sticking her with them until she reappears.
- Her scythe bleeds heavily, so try your best to avoid getting hit.
- Cutting off her tail rewards you with Priscilla's Dagger, and defeating her grant's you her soul.
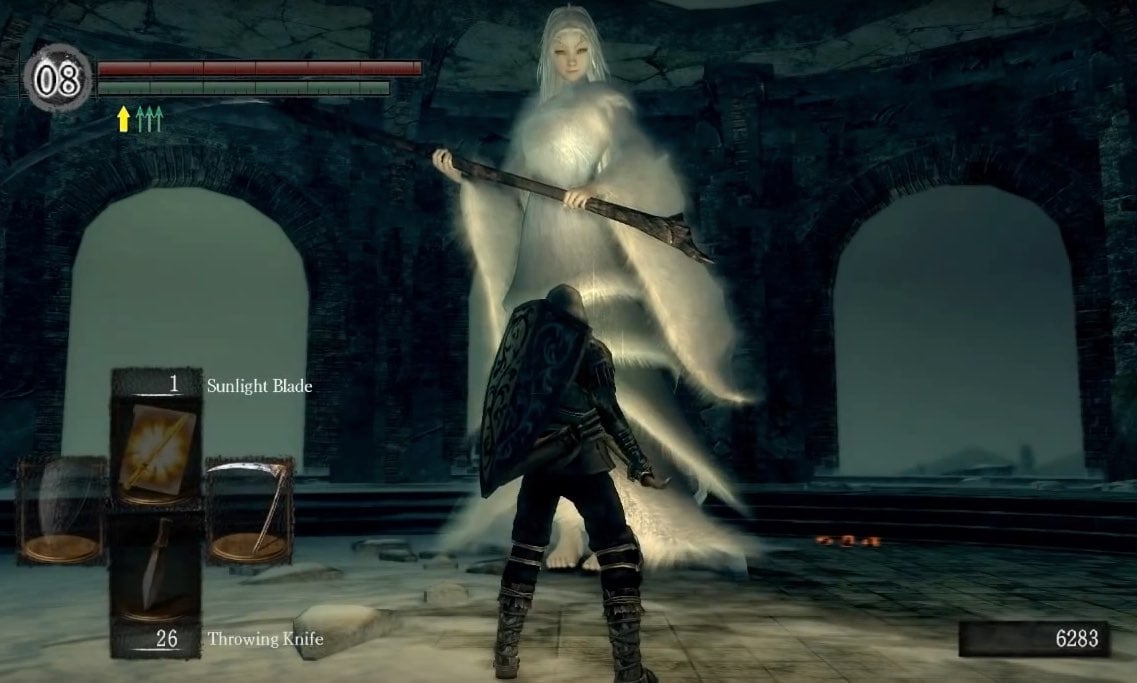
Boss Fight: Crossbreed Priscilla
Whatever you decided to do with Priscilla, go to the back of the boss arena and you'll see a plank that leads to a drop. On your way to it you'll notice benches on either side, and if you've killed King Jeremiah, you should find his Xanthous Set on a corpse here.
Note: If you killed him and it does not appear here then a quick quit and reload will make it appear.
If you now approach the end of the plank this will trigger a cinematic showing you tentatively jumping off the edge and you'll then be placed back at the large painting in the chapel in Anor Londo again.
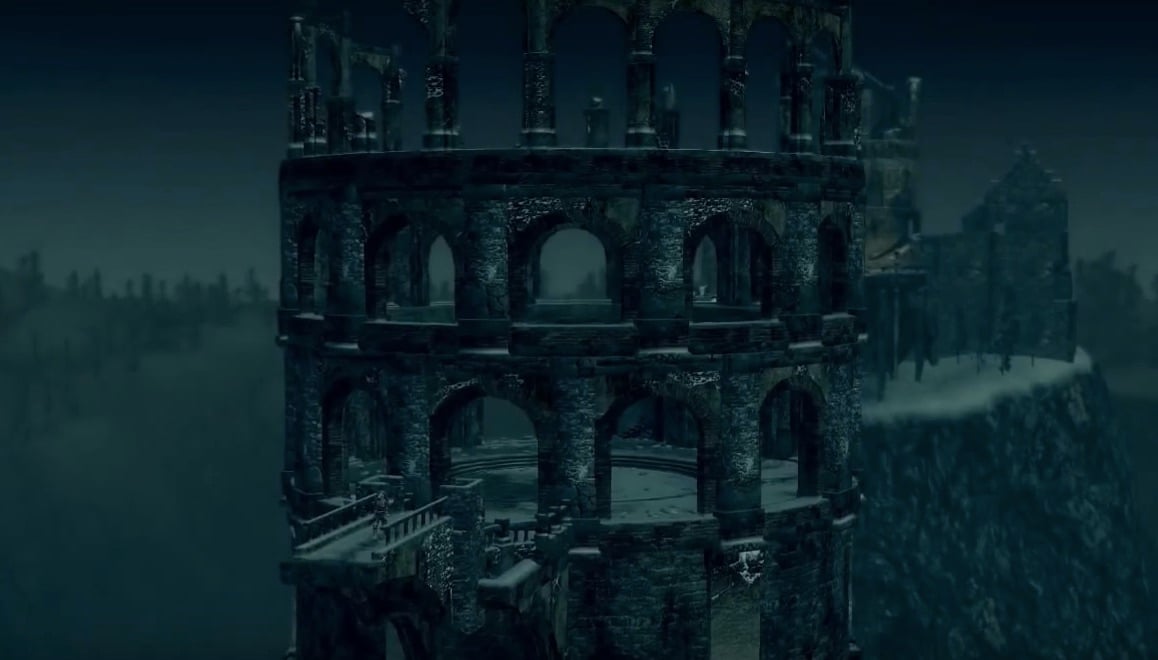
Farming
The Painted World of Ariamis is one of the best places to farm souls fast. Take out the Phalanxes for 500 souls each, then run back to the bonfire. With Silver Serpent Ring and Symbol of Avarice you can farm 12-15K Souls in less than a minute.
Also note that on the path way to Crossbreed Priscilla, the Tower Knight guarding her will always drop a Large Titanite Shard. Can take some time to get what you need, but its drop rate 100%.
See: Farming for more farming strategies.
Speed Run Walkthrough
A fast walkthrough of how to get to the end of the level the fastest, picking up only essential items goes here.Notes & Trivia:
- You can jump off the narrow bridge leading to the house full of Engorged Zombies and down into the courtyard to skip a portion of the level and open the bonfire shortcut door early.
- The two corpses hung up via rope can be shot down with ranged weapons, making getting their items easier.
- The Painted World of Ariamis later inspired The Painted World of Ariandel, which is most likely the same area.
 Anonymous
After many years my favorite area in the game begins its so reminiscent of the tightly crafted level design from that theyve gotten away from since Bloodborne.

 Anonymous
 Anonymous
 Anonymous
Anyone else notice the similarities between this and the first level of Goldeneye? The environment, the layout, and especially the shot of the MC diving off the bridge at the end

 Anonymous
Where is the white titanite chunk that is mention in materials section?

 Anonymous
I was gonna spare her since she is beautiful and has big boobas then i heard her bullshit. inhabitants kind? in that case let me return that kindness to you

 Anonymous
"This land is peaceful-"
*Screaming as I get whpped and burned alive by Jeremiah in the middle of a field of impaled corpses.*
"-it's inhabitants kind."
*Screaming as I get shredded by bonewheels.*
And this is why people attack Priscilla.
 Anonymous
I like when RPGs have snow areas. This was a smart way of implementing one.

 Anonymous
you can use the choas storm pyromancy to get almost all of the phalanx (blob with spear) in one cast, finish the rest off with a one hitter (5 to 0 phalanxes) and hit the bonfire. To cast get the wolf ring or something with poise to complete the cast ! from start to finish ! With the poise you can get hit once. Enter on the right for element of surprise, run up to them, cast and walk slowly to cuddle up with the side of the circle.
TIPS: Carefull of the hollows guarding the bonfire; mess up your timing and you should start over, for the phalanxes are no longer grouped; carefull when exiting the world, dont count your money; no other buff required other than poise (havel's shield)(stone skin is not advised bc of slowness); Get the silver serpant ring; Enter on the right of the boxes (cages); most important is that casting takes the whole cast even when it starts doind damage, if you get hit the cast stops and you might not kill every one, but when the one dude get hit that targeted you along the way there, you are safe from getting hit out of casting the complete spell.
 Anonymous
Unsure if this has happened to anyone else, but my first run here only spawned two phalanxes and no harpy came down on my head. Bug?

 Anonymous
is there any bonfire in this world to teleport to other bonfires?

 Anonymous
jump attack = Left stick Forward and heavy attack at the same time.

 Anonymous
Truly, the best spot to grind in the game, with high soul drops, tons of corpses with useful items, lots of humanity, and Titanite. Lot's of story in this place as well, and, just beutiful level and great enemy design! Plus, if you have good equipment (For me, a +10 lightning spear, Painted gaurdian armor, +6 Fire grass crest sheild (Can someone please explain to me what a fire sheild does? I am slightly confused by it.), Wolf ring, and Iron defense ring (a total of 16.1 carry weight, if anyone's intrested)), it actully is easy, even Priscilla. I would higly recommend for those that are struggling (As well as the forest behind the gate, in Darkroot garden), or are just raging at Orenstein and Smough (as I currently am) and need a break. Happy soulin'!

 Anonymous
"This land is peaceful, it's inhabitants kind."
Indeed! So kind, in fact, they'd happily free you from the burden of your souls and humanity. Such friendly folk!
 Anonymous
only part that confuses me about this walkthrough, they say "kill the 2 harpies (unless you already killed them with the dried finger). . ."
how do you "kill" the harpies with the dried finger? the page for the finger says its a pvp item for summoning more players into the world.
so, what. . .you would summon 2 co op partners in to kill the harpies for you? what's the point of that?
 Anonymous
Replaying this gives me flashbacks to the hardest boss to solo in all 5 games... Sister Friede.

 Anonymous
 Anonymous
I went in a man and went outside a proud simp with +20 SL. Suffer was worth it, would definitely come here again.

 Anonymous
 Anonymous
Scared myself.
The game glitched and no enemies were spawning even if I rested at the bonfire (even priscilla).
When I jumped off the game just stayed on a black loading screen but when I turned the game off and back on it was fixed.
Has this happened to anyone else? (I was grinding for souvenirs)
 Anonymous
For me the lower half of the bone dragon wont stand up no matter what i try so could someone please help me?

 Anonymous
Are you fing kidding me? I softlocked a 13 hour character because I did TOO MUCH DAMAGE?

In the Remaster, the corpse with Dry Finger on it contains a Twin Humanities instead. You can buy Dry Finger from the Undead Merchant in Undead Burg for 2000 souls.

 Anonymous
If you jump attack the back of the dragon after you kill it, it will stand up allowing you to pass by it and skip opening the door via the levrr in the well

 Anonymous
 Anonymous
I died to bonewheels in that sewer more times than my total deaths in the whole game outside

 Anonymous
To avoid becoming toxic equip a long weapon like a spear or use R1 and then R2 for weapons like claymore,the tox cloud will never reach you

 Anonymous
Ah! A group of cowardly hollows and vile engorged pyromancers are preparing to attack! But with the help of my wondrous WINGED SPEAR, i line them up and, while hiding safely behind my shield, i make short work of them and the wondrous WINGED SPEAR's attack range lets me exit this duel untouched by the filthy engorged's toxic blood. Once more, the wondrous WINGED SPEAR has proven itself superior to all other weapons.

 Anonymous
I hate playing every second of this game and I'm only suffering through these awful mechanics because I've beat all the other souls games and I'd like to be done with them before elden ring. I might just never beat ds due to how shotty the game is lmao. It's story is nothing but items and areas. Which imo all suck ass.

 Anonymous
 Anonymous
bonewheels probably the most awfully designed enemies ive run into in the entire souls franchise god help you if two aggro you in that bull **** tunnel

 Anonymous
after you meet the phalanx and open the shortcut ( with the fog ring. at 36 str, and 31 dxt, with a +15 bastard sword) Im one hitting the phallanx and reaping the whole 6,500 souls in about 30 seconds on the first play through. from the first bonfire (with the fog ring equiped) run to the left of the blocks and snipe out one of the phalanx members, they'll all turn to the left to investigate. run around the right side of the blocks to an opening, get in tight to the gooey ****s and swing, you should take out 3-4 in one shot. continue circling and finding an opening, you can farm the **** out of it

 Anonymous
I wonder if there are players out there who have characters permanently leaving their summon signs/invading in the Painted World because they got trapped inside by Priscilla’s moan % glitch

 Anonymous
 Anonymous
Died after exiting the painted world because I didn't realize the guardians could chain backstab and I was just trying to run through. Props to them guys, mad skills there or horrible RNG lol. I had about a half million souls and 99 humanity and spawned at the Anor Londo bonfire which I couldn't use to warp because I killed the firekeeper. I have never been so careful going across the rafter beams trying to get back to my souls!

 Anonymous
If you invade here be weary of the narrow pathway up. Magic users love to take the hidden path to the right and perch on the ledge pelting you with sorceries. Unless you have an AOE attack you most likely wont make it through.
Had one person that killed me every single time no matter what I tried just due to limited range of movement and using crystal soul spear was combo'd with crystal homing soulmass which will basically one-shot most builds at lvl 60, if not the second soul spear is right behind it. After losing 3 times I switched to my faith build and attuned great magic barrier. That basically broke his/her build and might as well have been hitting me with a broken straight sword lol. Oh that victory was so sweet!
 Anonymous
Really enjoyed this place, I was having trouble in Anor Londo then I went there and exited 20 levels later.
Was tough at the beginning but by the time I got to the phalanxes I was already hacking through everything, also, they are great for farming souls.
Bonewheels are very easy using a shield.
 Anonymous
I only had issues with the skeleton wheels. This place was over so fast - i came here to double check that i didn't miss a boss. The only thing i missed was getting invaded - not sure why it didn't trigger. I was huuman for a good chunk of it :(

 Anonymous
 Anonymous
I love it when I invade and players try to rush me in the narrow walkway leading up to their bonfire with their mighty greatswords not knowing I'm a mage and they are doomed.

 Anonymous
This is one example of where "curiosity killed the cat/player". I was doing my first ever playthrough and it was a blind one from Blighttown forwards. I knew to where to go to get the rusted ring but also picked up the doll. When I got to the painting I was around lvl 30 and weapons weren't that great. I examined the paining out of curiosity and got sucked in and then realized I was stuck. That's actually how I found this site because I freaked out and was trying to see what I needed to do to leave. Let me just say that my combat skills improved a lot going through this area because it was a sure struggle. When I finally finished the area I felt inclined to break out a cigar in victory.

 Anonymous
Is no one going to mention the fact that there's multiple painting by this one dude it says so in the description of the painting guardian set

 Anonymous
Of all things in the well, it just had to be the ****ing Skeleton Wheels from the Catacombs.

 Anonymous
On Dark Souls Remastered, when I go to the upper bridge where you fight the undead dragon (already killed him before) I hear a weird loud sound, as if the dragon was still alive and crawling to me all over again, it freaked me out a little lmao. I died later and when I came back, I heard it again. Anyone else?

 Anonymous
this area is terrible, beautiful, but the enemies really ruin it. fireball stunlock spamming hollows that explode into toxic, regular hollows (nuff said), skeleton wheels (also nuff said) and those f*cking birds that grapple onto you and peck you to death. and the intertwining labyrinth thing about it can go f*ck itself

 Anonymous
 Anonymous
 Anonymous
"yeah, let's just dump a sh*t ton of the most annoying enemies in the first area we worked on"

 Anonymous
Ah, what a peaceful world. And its inhabitants are so kindful...

 Anonymous
I walked through the door that leads to the long path to priscillas arena and it cancelled my invasion but one happened just after it cancelled and I ended up in the chasm of the abyss but I haven’t entered the DLC yet

 Anonymous
Just use the havels armor in the well. You can't dodge the bonewheels in a light armor anyway :D

 Anonymous
Just beat the undead dragon, theres a blob in the middle of the bridge. I can’t attack it. It wont move. What do i do?

 Anonymous
dying after leaving this world will return you to the first anor londo bonfire regardless of you having discovered it or not.. dying after entering anor lando from defeating the iron golem, running around trying to find the bonfire.. results in being returned to the drop off point and losing all 60k souls you got.. UH HUH..

 Anonymous
Is it possible to go through the area, and fight Priscilla during another visit if i choose not to fight her my first time around?

 Anonymous
 Anonymous
Phalanx farm 101: 1. Get Dragon king axe 2. Go fast between them 3. Shockwaveeeeee

 Anonymous
 Anonymous
 Anonymous
So the thing is that i went in a bit low sl and accidently hit priscilla so now i can‘t leave the painted world because after she takes damage you have to fight no matter what

 Anonymous
After getting instakilled by a harpy's eye-pecking leg grap from full health I must question the writer's definition of "not dangerous"

 Anonymous
Something I just found while equipping it to deal with the undead dragon is that the giant’s halberd is actually long enough to kill the engorged hollows without taking any toxic buildup. If you keep your distance and hit with light attacks you’ll be outside the range of the spray and can kill them without issue. Makes this run WAY easier

 Anonymous
 Anonymous
Why does it say next is Sen's Fortress/Great Hollow? Great Hollow makes sense but you literally cannot get here before going through Sen's Fortress. Lol

 Anonymous
So... No lore on the painted world itself? Or, who the hell is Ariamis?

 Anonymous
It’s not a dried finger off the balcony in the beginning. It’s a twin humanities.

 Anonymous
So...came back to painted world a 2nd time to farm some souls and found you can warp in but not out. Alright, that's fine. Run to the end where you leave the first time, figure "Erm, well I guess I have to just walk off the edge"...and was told "You died". Go from 140k souls, 6 humanity to 0.
Then the screen cuts to total black for legitimately about 2 minutes. Finally get a normal loading screen and wind up dumped back at the firekeeper bonfire in anor londo, except I killed that keeper for her soul so there's no bonfire. Homeward bone takes me to same deactivated fire. Go running out to the spiral staircase lift...but I'd left for ariamis from the darkmoon bonfire, and thus can't actually get back on b/c apparently there's no call lever on the first path. So I have to extremely carefully cross the rafters once again, not even knowing if my souls are still in ariamis. Got backstabbed by a guardian and clenched like a champ as I nearly got thrown off the rafters. Finally get around, call lift, and of course run all the way to sun princess fire instead.
Back into ariamis, carefully make my way back and thank god all my stuff was there properly, so I just kinda stand there unsure what to do. Finally I figure I have no option but try again, and THIS time I get a custscene and exit properly. Can't find anyone else on the internet claiming to have ever had this happen.
SO, I guess the point of this long spiel is A: to publicly say WTF was that, and B: to say if you ever go walking towards that edge and no cutscene triggers (and you didn't do the one-shot priscilla thing), don't just walk off. Either try going back and walking towards the ledge again or consider putting on a ring of sacrifice before jumping.
 Anonymous
 Anonymous
Drop a poison mist on the slobs around the statues and clear the enemies around the first tower, by the time the poison kills you should have 15k souls and a chance at humanities from the rats. I entered this area with 3 humanity and left with 49 and went from level 55 to 5 in 3 hours

 Anonymous
Doesn't it look like the "Ariandel" place in the DLC? Maybe some connections with Yorshka and Priscilla


That knight at the end respawns AND DROPS THE LARGE TITANITE SHARD. every time. Every SINGLE time you run this zone.
2
+10
-1